Tuesday, January 31, 2012

Classic Vanilla Cake with Fluffy Vanilla Icing


I have a problem. I'm a pastry chef... who hates decorating cakes.

I know, I know. How can this be? There are people out there who dedicate their whole careers just to cakes. I'm just not one of them.

I love baking all things sweet. And I love decorating sugar cookies. But stacking and decorating layer cakes? Eh. Part of the problem is that decorated layer cakes aren't exactly my strong suit. I, like most pastry chefs I know, consider myself to be a perfectionist. So when I can't get the sides of my cake perfectly smooth, or a rosette perfectly centered, or fondant corners perfectly sharp, it drives me crazy!

Clearly the answer is to practice more. So, in an effort to improve my skills, I've decided to bake and stack at least one cake a week for... the foreseeable future. Sure, I could just use a foam dummy cake instead of baking a new cake every week, but where's the fun in that?


I have an ever-growing list of cake recipes and flavor combinations that I can't wait to tackle. Today marks week 1, and I decided to start with this simple classic. May seem a little boring, but vanilla cake and vanilla frosting are both great bases for later additions, like chocolate chips, pureed fruit, or flavored extracts. And I love, love, love this vanilla cake. It's so light and fluffy and delicious! The perfect vanilla cake, if you ask me.


This icing is a traditional confectioner's icing. To me, it tastes like supermarket frosting. Before you think I'm trash talking my local grocer, let me explain. It's super fluffy and sweet, not too buttery, and always a crowd pleaser. I find it a little hard to work with when doing some piping techniques because it can get a little soft, but for a lot of people (me included) the flavor is preferable over a Swiss or Italian meringue buttercream (Don't worry; we'll get to those soon enough!).


Now I just have to figure out what to do with all this cake.

Classic Vanilla Cake
Yield: One 3-layer 8'' cake

Ingredients:
1 1/4 cups (320 grams) milk
1 Tbsp vanilla extract
5 (180 grams) egg whites
3 1/2 cups (400 grams) cake flour, sifted
2 cups, plus 6 Tbsp (400 grams) granulated sugar
2 Tbsp baking powder
1 tsp salt
2 sticks (226 grams) butter, soft, cut into cubes

Directions:
1. Line the bottoms of three 8'' round cake pans with parchment paper. Butter and flour the pans and paper, or grease with cooking spray. Preheat oven to 350 degrees F.
2. In a large measuring cup or bowl, combine the milk, vanilla, and egg whites. Whisk lightly with a fork and set aside.
3. Place the flour, sugar, baking powder, and salt in the bowl of an electric mixer. Mix for one minute on low with the paddle attachment. Add the butter and 1/3 of the milk mixture. Mix on low until the batter is moistened, but thick, like a paste. Increase the speed to medium and mix for about 2 minutes.
4. Scrape down the sides of the bowl. Beat in the rest of the milk mixture in three additions, beating on low after each addition until the liquid is just incorporated, about 30 seconds. Scrape down the sides and bottom of the bowl as needed.
5. Divide the batter evenly between the three prepared pans. Bake for 28-33 minutes, or until golden brown and a skewer inserted in the center comes out clean. Allow to cool for 10 minutes before removing from the pans. Allow to cool completely before frosting.

Recipe Notes:
  • To get truly even cake layers, I divided the batter using a scale, pouring about 480g in each pan.
  • For a special touch, you could substitute the seeds from one or two vanilla beans instead of the vanilla extract.
Recipe adapted from The Cake Bible by Rosy Levy Beranbaum
Vanilla Icing
Yield: Enough icing to fill and frost one 3-layer 8'' cake

Ingredients:
1 lb butter
6 oz  shortening
1 lb powdered sugar

Directions:
1. Cream butter in an electric mixer with the paddle attachment until soft.
2. Add the shortening and continue to cream on medium speed until light and fluffy.
3. With the mixer on low, gradually add powdered sugar. Increase speed to medium and beat until icing is light and fluffy.

Recipe Notes:
  • This icing can be stored at room temperature for up to a week.

Thursday, January 26, 2012

Mustard Barbecued Pork


Is anyone tired of winter yet? It seems like it. Valentine's decorations are out, people are pinning Easter cookies. Seriously people, what's the hurry? Winter isn't so bad. No need to mow the lawn or rake leaves. No sticking to your hot leather car seats. Plus, you can leave your oven on all day without needing to stick your head in the freezer.

This is another of those recipes with fall off the bone tender meat. That takes just 10 minutes of prep in the morning and hours later, dinner's magically on the table with hardly any additional work. That will infuse your house with such an enticing, delicious smell your neighbors will come sniffing at your windows.


The mustard sauce for this barbecued pork is a little unconventional, but it's popular in parts of South Carolina. With family in Charleston, Dan's been raving about it for years, so when this recipe popped up in this month's Southern Living, it went on my short list.

I also took their advice and made Banh Mi sandwiches. Sort of a cross between a Vietnamese and French sub sandwich. Grab some crusty bread, like big slices of a french baguette. Add some sriracha mayonnaise (sriracha+mayo!), pickled peppers and onions (Seriously, don't skip these!). Top everything off with some shredded carrot and a few paper-thin slices of jalepeno. Sprinkle on some cilantro leaves if they don't give you flashbacks of having your mouth washed out with soap.


Mustard Barbecued Pork
Yield: 8-10 servings

Ingredients:

1/3 cup light brown sugar, packed
2 1/2 tsp kosher salt
1 1/2 tsp garlic powder
1 1/2 tsp paprika
1 tsp onion powder
1/2 tsp ground red pepper
1 5-lb bone-in pork shoulder (Boston butt)
1 cup yellow mustard
1/3 cup honey
1/4 cup apple cider vinegar
1 1/2 tsp Worcestershire sauce

Directions:
1. Preheat oven to 275 degrees. In a small bowl, combine the brown sugar and all dry spices. Rub all over pork shoulder and place in a large dutch oven.
2. Whisk together the remaining ingredients to create a sauce. Pour over top of the roast.
3. Cover and roast 8-10 hours. Remove from oven and let sit 15 minutes. Shred with two forks and stir into remaining sauce.

Pickled Peppers & Onions

Ingredients:
1/2 red onion
1/2 red bell pepper
1/2 yellow bell pepper
1/2 green bell pepper
1 cup white vinegar
1 cup water
6 Tbsp granulated sugar
2 Tbsp kosher salt
1/2 tsp crushed red pepper flakes

Directions:
Slice the onion and peppers into 1/4'' thick slices. Let the onion slices soak in a bowl of ice water for at least 10 minutes. In a small pot, bring vinegar, water, sugar, salt, and pepper flakes to a boil, stirring occasionally to ensure the sugar is dissolved. Place the pepper and onion slices in a large glass bowl of 1-qt canning jar. Pour the warm liquid over the vegetables and allow to sit, uncovered at room temperature for 1 hour. Cover and chill for 24 hours. Store refrigerated for up to a week.

Recipe Notes
  • If you have a large enough slow-cooker (mine was too small), follow all the above directions but cook in your slow cooker on low. If you're short on time, you can cook it on high for just 4-6 hours.
  • If you're just planning on making this for a regular weeknight dinner, you're going to end up with plenty of leftovers. Freeze them flat in plastic bags for easier storage and quicker defrost.
  • If you're sticking with a more traditional barbecued pork sandwich instead of a Banh Mi, make some extra mustard sauce to mix into the cooked meat or drizzle on top of each sandwich. Don't forget the slaw!
Recipe adapted from Southern Living Magazine

Tuesday, January 24, 2012

Lemon Poppy Seed Bundt Cake


It's gloomy here. Cold, and grey, and gloomy. It's been like this for 3 days, with rain off and on. Now, I could say I baked this cake to bring a little sunshine into this dark and dreary world, but that would be a lie. And also kind of sappy and obnoxious. Really, I baked this cake because I wanted to use my new bundt pan (thanks, Mom!). And because I wanted cake.


In my mind, a bundt cake gives you permission to eat cake at any time of the day. Piece for breakfast? Yes please. Mid-afternoon snack? Definitely. After dinner dessert? Add some vanilla ice cream and we're in business.


Plus, it's nice that I'm still baking and eating cake without having to fuss with stacking and icing a layer cake. Sometimes I'm just not in the mood, ya know?


Lemon Poppy Seed Bundt Cake

Ingredients:
For the Cake
2 sticks butter
2 cups granulated sugar
Zest of 2 lemons (approx. 2 Tbsp)
3 cups all-purpose flour
1/2 tsp baking soda
1/2 tsp kosher salt
1 cup buttermilk
Juice from half a lemon (approx 2 Tbsp)
1/4 cup poppy seeds

For the Lemon Glaze
3/4 cup powdered sugar
Juice from half a lemon
Zest from half a lemon

Directions:
1. Preheat oven to 325 degrees F. Grease a bundt pan and set aside.
2. In the bowl of an electric mixer with a paddle attachment, cream the butter, sugar, and lemon zest until light and fluffy.
3. In another medium bowl, whisk together the flour, baking soda, and salt.
4. Add the eggs to the butter mixture, one at a time, and continue to beat on medium speed until fully incorporated and pale in color.
5. Add the flour and buttermilk alternately, beginning and ending with the flour. Keep the mixer on low and be careful not to overbeat. It's fine to add the buttermilk before the flour completely disappears into the batter.
6. Add the lemon juice and poppy seeds and mix on low just until incorporated.
7. Pour into prepared bundt pan and bake 60-65 minutes, until the top springs back to touch and a toothpick inserted into the center of the cake comes out clean. Allow to cool in the pan for 30 minutes.
8. While the cake starts to cool, make the glaze. In a medium bowl, whisk together all ingredients. Invert the cake onto a cooling rack and pour the glaze over the still warm cake, allowing it to run down the sides and center of the cake. Allow the cake to cool completely before serving.

Recipe Notes
  • If you want a more opaque glaze, more of a traditional icing, just wait for the cake to cool completely before glazing. You can use the glaze just as is, or add more powdered sugar for a thicker icing.
  • I actually think this cake is even better the second day.
Recipe adapted from The Silver Palate Cookbook

Sunday, January 22, 2012

Snowman Cookies


What goes better with snowflakes, than cheery, glittery, snowmen?


Or snow-women as the case may be.


I can't take all the credit for these cute little guys though. The fabulous Bakerella engineered them first, and once I saw them I knew I had to try my hand at replicating them.


I actually did something a little different with these cookies and used edible ink pens to make the faces, which I'd never used before. I think they turned out pretty well! And it was nice not to have to make three different colors of icing just for the faces.

Saturday, January 21, 2012

Snowflake Cookies


This is the closest to snow we've come all winter.


And as much as I enjoy snow,


for it's pretty pure white,


and soft, downy flakes,


for turning the whole world into a winter wonderland,


if I'm going to have to leave my house at some point


(and inevitably, I will; one cannot survive on cookies alone)


I'd prefer to not have to tramp through a knee-high snow bank, or scrape 6 inches of ice off my windshield, or accidentally plop my foot right into an icy puddle.


So for now, these sparkly sweet flakes will do.

Monday, January 16, 2012

Chipotle Pepper Hummus


When we have extra cans of chickpeas in the pantry, I can't help but think: hummus. We tried our hand at baked falafel (not bad, but not great), and roasting them is on my "To-Cook" list, but hummus is always my go-to. Especially considering I had some delicious chipotle peppers left over from Shredded Beef Tacos just calling my name from the fridge. They're not exactly an easy ingredient to incorporate into other things, but hummus? Hello blank slate! They add a great smokey flavor without too much heat.

I posted a basic hummus recipe a few months ago, and of course you could just add a couple peppers to that one, but we also had tahini paste chilling in the fridge, so I altered the recipe slightly to use it.

Oh, I also did this.


I had some time so I squeezed those little peas right out of their casings (I mentioned this in my first hummus post but didn't take the time to do it). The process is really easy; just squeeze a chickpea gently between your thumb and forefinger, and the casing will slip right off. Some might even come off when you rinse them. I have to be honest though, peeling all these chickpeas took me at least 30 minutes, which is a lot of time to spend on something so simple. But the benefit is silky smooth hummus, just like you'd buy off the shelf. Plus the process gives you the same kind of reward that rubbing dry dough off your fingers does, or peeling glue off your hands.


Chipotle Pepper Hummus

Ingredients:
2 cloves garlic
24 oz canned chickpeas, drained, rinsed, and peeled
3-4 Tbsp tahini
3 chipotle peppers in adobo sauce
Juice from half lemon
1 tsp kosher salt
1/2 tsp pepper
1/4- 1/2 cup water

Directions:
1. Place the garlic cloves in the bowl of a food processor and process until minced.
2. Add the remaining ingredients, except the water.
3. Process until the consistency is thick but smooth, scraping down the sides of the bowl as necessary.
4. Add half the water and process. Continue to add water until you reach your desired consistency.

Recipe Notes:
  • I like my hummus a little thicker, so I only added about 1/4 cup hummus.
  • Leaving out the chipotle peppers will give you a great classic hummus.
  • Peeling the chickpeas is optional. Leave them just as they are from the can and you'll still end up with a delicious hummus. It will just have more texture.

Sunday, January 15, 2012

Confetti Cookies

I'm not exactly sure what possessed me to make these cookies. As cookies go, sugar cookies aren't really my favorite. I'd say they're not even in the top three. But there's just something about them. I think it's the sprinkles.


Everything's better with sprinkles. Now, these aren't the kind of sugar cookie you decorate. They're more like the perfect chewy sugar cookie. Buttery, soft, sweet, with that extra special flare of being rainbow colored.


I may have eaten more than three my fair share of these before I even had dinner today. If you need me I'll be in a sprinkle-induced sugar coma.


Confetti Cookies
Yield: 18 cookies

Ingredients:
1 stick butter
3/4 cup granulated sugar
1 egg
1/2 tsp vanilla
1 1/4 cups flour
1/2 tsp baking soda
1/4 tsp baking powder
1/4 cup rainbow sprinkles

Directions:
1. Preheat oven to 375 degrees F. Line two sheet pans with parchment paper and set aside.
2. Cream butter and sugar with the paddle of an electric mixer on medium speed, until light and fluffy.
3. Add the egg and vanilla extract and continue to beat on med-high speed until incorporated. Don't worry if it looks a little separated.
4. Add the flour, baking soda, and baking powder. Mix on low until almost fully incorporated. Add the sprinkles and mix until all ingredients are incorporated together.
5. Divide the dough into 1 oz balls, about the size of a ping pong ball. Arrange them on the sheet pans, leaving about 2'' of space between each cookie. Dampen your fingers and lightly press on the dough to flatten to about 1/2'' thick.
6. Bake cookies for 11-13 minutes, or until the edges just begin to brown. Rotate the sheet pans halfway through baking. Allow cookies to cool completely on baking sheets.

Recipe Notes
  • No sprinkles? Leave them out and you still have an amazingly delicious chewy sugar cookie.
  • Looking for something easy to bake for Valentine's day? Replace the rainbow sprinkles with red and pink ones and voila!

Thursday, January 12, 2012

Chicken and Kale Baked Pasta


Hey, you. Yeah you. You need this pasta in your life. It's creamy, and cheesy, and comforting, AND chocked full of healthy things. Which means this totally fits into your New Years Resolution diet. 

No really, I'm not kidding. Multigrain pasta? Check. Protein-packed chicken? Check. More than a pound of healthy greens? Check!


Seriously, have you gotten on this kale thing yet? If not, what are you waiting for?? It's super healthy, easy to cook, and tastes rich and delicious.


Still not convinced? I swear, this is the perfect vehicle to introduce kale into your world. The flavor definitely takes a back seat to the nutty Parmesan, creamy ricotta, and bright lemon. And the texture blends right in to the rest of the pasta.


It's a great way to get in those healthy veggies with the added bonus of comforting carbs and cheese. Seriously, is there anything better? I think not.


Chicken and Kale Baked Pasta
Yield: 6-8 servings

Ingredients:
1 box (14.5 oz) multigrain rotini pasta
2 Tbsp unsalted butter
1 yellow onion, diced
3 garlic cloves, minced
1.5 lb kale, tough stems and ribs removed, coarsely torn or chopped
1/3-1/2 cup chicken stock
2 cups cooked chicken, shredded or cut into pieces
48 oz part-skim ricotta cheese
Zest of two lemons
3/4 cup grated Parmesan cheese, divided

Directions:
1. Preheat oven to 350 degrees. Cook pasta according to package instructions. Drain and return to pot or very large bowl. Set aside.
2. In a large high-sided skillet or another deep pot, melt butter over medium heat. Add onion and cook, stirring occasionally, until translucent, 3-4 minutes. Add garlic and cook until just fragrant, another minute.
3. Add the kale along with 1/3 cup chicken stock. Cover and allow the kale to steam for 2-3 minutes. Uncover the pot and stir, adding the additional chicken stock if the pan is too dry. Continue to cook, covered, until the kale is just tender, another 2-3 minutes.
4. Add the kale and onion mixture to the cooked pasta along with the chicken, ricotta cheese, lemon zest, and 1/2 cup Parmesan. Stir to combine.
5. Pour the pasta into a 9x13'' baking dish. Top with the remaining 1/4 cup Parmesan. Bake 30 minutes or until the cheese is just starting to brown. Let rest 5 minutes. Serve warm, topped with additional grated Parmesan.

Recipe Notes:
  • I'm not sure why my box of pasta was only 14.5 oz instead of the usual 16, but you could definitely use a full pound with no other changes necessary.
  • If all of the kale won't fit in your pot at once, add just as much as will comfortably fit, adding more as the kale cooks down. Add the chicken stock more gradually to ensure it doesn't steam away before all the kale is cooked.
  • Obviously this is an easy dish to make vegetarian. Just leave out the cooked chicken, and substitute vegetable broth or water for the stock. 
  • If you're really not a fan of kale and I can't convince you otherwise, you could always substitute in fresh spinach or another leafy green.

Recipe adapted from Martha Stewart

Tuesday, January 10, 2012

Shredded Beef Tacos


Today wasn't the best day. Someone cut me off on my drive home from work and nearly hit my car. There was a ton of traffic just minutes from my house. I had to drop off my car at the mechanic with no sign of when I'll get it back. I hit myself in the head with a door. Yup, a door.

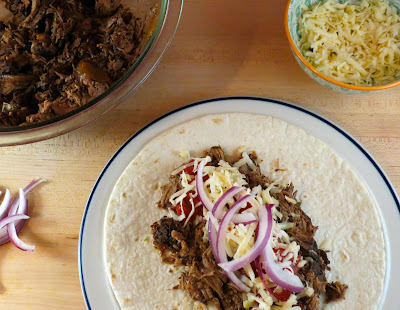
But you know what could improve a day like today? Walking in the door to smell this simmering in the crock pot.


Dinner on the table in 10 minutes? I think so. Comfort food? Yes, please.


Taco night? Spicy.


Shredded Beef Tacos
Yield: 4 servings

Ingredients:
1 tsp chili powder
1/2 tsp cumin
1/2 tsp smoked paprika
1/2 tsp oregano
1/4 tsp pepper
1/2 tsp kosher salt
2 lb boneless chuck roast (3 lbs if bone-in)
1-2 Tbsp vegetable oil 
1 1/2 cups beef broth or stock
4 chipotle peppers in adobo sauce, diced
1 Tbsp tomato paste
1 Bay leaf
1/2 large yellow onion, diced
3 garlic cloves, minced
Flour tortillas
Taco garnishes (avocado, cheese, lettuce, tomato, etc.)

Directions:
1. In a small bowl, combine all spices (except bay leaf). Rub spice mixture evenly over beef, coating all sides as much as possible.
2. Heat a large skillet over high heat. Add vegetable oil. Heat to almost smoking. Lay the meat into the skillet, allowing the first side to sear until it is well browned, 3-4 minutes. Flip the meat over, searing the other side as well. Lay the meat into the bowl of a slow cooker.
3. Pour the beef broth into the hot pan, scraping any browned bits off the bottom with a wooden spoon. Add the peppers and tomato paste and bring to a boil. Reduce the heat to low and simmer until reduced and slightly thick, 2-3 minutes.
4. Add the bay leaf, onion, and garlic to the slow cooker, over the meat. Pour in the cooking liquid. Cover the slow cooker and cook on low for at least 6 hours, and up to 8.
5. Remove the meat from the slow cooker to a large bowl. Shred with two forks. Add some cooking liquid and onions if desired. Serve warm in flour tortillas. Garnish with your favorite taco toppings.

Recipe Notes:
  • This recipe does require some prep work, so I find it easiest to make on a day when I don't actually have to work or need to be somewhere early in the morning. But if you want to do some prep the night before, you can season the steak, chop the onion and garlic, and measure and mix together the beef stock, peppers, and tomato paste. Reserve all in the fridge overnight.
  • The heat in this recipe comes from the chipotle peppers, so add more if you like it spicy or less if you like it on the mild side.
Adapted from My Kitchen Addiction

Thursday, January 5, 2012

Pretzel Chocolate Chip Marshmallow Cookies


I think I may have created the most epic cookie of all time. 

Ok, so that might be a slight exaggeration. I mean, there's no bacon in it.


But I imagine these taste like what a s'more would taste like if you replaced the graham crackers with chocolate chip cookies and sandwiched them with a chocolate covered pretzel inside instead of a boring piece of plain chocolate. 

What, too far? 

I used my favorite chocolate chip cookie as a base for these and then basically put them on steroids. Even though we learned last time that the 24 hour rest period is helpful, I went ahead and baked a test cookie the day I made the dough. You know, for more research. And also because I really wanted a cookie. And when you have cookie dough in your fridge that looks like this...


I mean, come on. I challenge you to resist the temptation.

Frankly, I think the cookies I baked the same day I made the dough tasted just as good as the ones I baked the next day. That is, sinfully delicious.


I tried to get a picture of the strings of melted, gooey marshmallow that stretch across your fingers as you break one of these in half, but I mostly ended up with lots of pictures that look like this:

Self timer fail. But cute apron win!

And lots of broken cookies. Oh well, guess you'll just have to bake some and see for yourself. 


Pretzel Chocolate Chip Marshmallow Cookies
Yield: 15 cookies

Ingredients:
4.25 oz (1 cup minus 1 Tbsp) cake flour
4.25 oz (3/4 cup plus 1 Tbsp) bread flour
1/2 tsp baking soda
3/4 tsp baking powder
3/4 tsp kosher salt
10 Tbsp unsalted butter, softened
5 oz (1/2 cup plus 2 Tbsp) light brown sugar
4 oz (1/2 cup plus 1 Tbsp) granulated sugar
1 egg
1 tsp vanilla extract
3/4 cup semisweet chocolate chips
3/4 cup mini marshmallows
3/4 cup mini pretzels, left whole

Directions:
1. Preheat oven to 350 degrees F. Line a baking sheet with parchment paper or a silicone baking mat. 2. In a medium bowl, whisk together both flours, the baking soda, baking powder, and salt. Set aside.
3. In the bowl of an electric mixer fitted with the paddle attachment, cream the butter with both sugars on medium speed until very light and fluffy, 4-5 minutes.
4. Scrape down the sides of the bowl. Add the egg and vanilla and return the mixer to medium speed. Mix until the egg is completely incorporated.
5. Add the dry ingredients and mix on low until not quite incorporated. Add the chocolate chips, marshmallows, and pretzels. Mix until just incorporated; you don't want to break the pretzels up too much (bravo if you can even keep a few whole!).
6. Portion the dough into 2 oz balls, about the size of a golf ball and space them evenly on your prepared baking sheet. Bake 15-18 minutes, of until the edges of the cookies just begin to turn golden brown. Remove baking sheets to a wire rack but leave the cookies on the sheet to cool. Serve slightly warm or at room temperature. These cookies are best the day they're made, but will keep stored at room temperature in an airtight container for up to 3 days.

Recipe Notes:
  • Unlike the original cookies this recipe is based on, I do not think these need to be rested for 24 hours for them to be at their peak of deliciousness, but the dough will absolutely keep well wrapped, in the fridge for up to 72 hours, or the freezer for about a month.  
  • Your cookies may still look underdone at the 15-18 minute mark but don't overbake them! They are going to look a little gooey thanks to the melted marshmallow, but the dough itself will be cooked through. 

Wednesday, January 4, 2012

Spanikopita


In order to understand this conversation, you have to know what Sfinge is. Sfinge (pronounced SFEENJ. It rhymes with...nothing) is something Dan's Italian family has been making for decades. It's a dense, savory bread filled with meat, usually ground beef, and provolone cheese, and topped with lots of Oregano. Don't try to google it; you'll just come up with cream puffs. No really, you will. 

Me, on the phone with Dan: How long do we have to keep the sfinge around?
Dan: Oh, yeah. It's probably not that great anymore.
Me: Question- Considering that sfinge is chocked full of meat and cheese, why doesn't it have to be refrigerated?
Dan: Well, you see, sfinge is a unique combination of special ingredients that have evolved to a point that they don't need to be refrigerated.
Me: ...OK. (Cutting myself a piece and starting to eat it)
Dan: On second thought, maybe you can throw it away.
Me: (Silent chewing.)
Dan: Or maybe you should feed it to the dogs first and see how they do.
Me: (Feeds piece to Dexter who gobbles it up and sprints away.) He seems fine. (Cuts self bigger piece.)

After a few minutes I decided week-old sfinge isn't that bad, and that my stomach felt fine, and proceeded to eat two of these.


So now if I die of food poisoning we'll never know the real cause. Just kidding. These are totally safe to eat and delicious. It would definitely be the sfinge.


Spanikopita
Yield: 2 servings (but this recipe is easily doubled)

Ingredients:
1-2 Tbsp olive oil
1/2 small onion (about 1/3 cup), small diced 
1 clove garlic, minced
9 oz box frozen chopped spinach, thawed and drained
1 Tbsp fresh dill, chopped
1/4 cup feta cheese, crumbled
salt and pepper
1 egg, lightly beaten
1 sheet puff pastry, thawed overnight in the fridge
Egg wash (1 egg beaten with a little milk or water, plus a pinch of salt)

Directions:
1. Place a medium saute pan over medium heat. Add the oil, enough to mostly coat the bottom of the pan.
2. Add the onions and cook until translucent, 4-5 minutes. Add the garlic and cook another minute, or until fragrant. Add the spinach and dill, mixing just to combine.
3. Transfer the filling to a bowl and add feta cheese. Taste and add salt and pepper to your liking. Add the egg and mix to combine. Allow the filling to cool at least to room temperature.
4. Preheat oven to 375 degrees F. On a lightly floured board, roll out the puff pastry into a larger rectangle, until it is about 1/4'' thick. Cut the dough in half lengthwise. Cut each long piece into 3 equally-sized squares.
5. Place about 2 heaping tablespoons of filling into the center of each square. Brush the edges of each square lightly with egg wash. Fold the dough over, corner to corner, creating a triangle. Press down firmly to seal the edges with your fingers or a fork.
6. Place all the squares on a sheet pan lined with parchment paper. Brush with egg wash. Bake for 25-30 minutes, or until the pastry is golden brown. Allow to cool slightly, and serve warm.

Recipe Notes:
  • Spanikopita is traditionally made using phyllo dough instead of puff pastry, but puff is what I had in my freezer and can be a little easier to work with.
  • I like to taste the filling before adding any salt because feta can be very salty and usually I find I don't need to add any. Just remember to taste it before adding the raw egg!
  • You can make these squares as large or as small as you want. Serve smaller ones as an appetizer or larger ones for lunch or a vegetarian dinner.
  • I had a little filling leftover so I added the extra egg wash to it and baked it in greased mini muffin cups for about 10 minutes. 
     
    Ta-da! Mini crust-less quiches!
    Related Posts Plugin for WordPress, Blogger...