Wednesday, June 30, 2010

Black Bottom Cupcakes

My second request at work was for cheesecake.

Cheesecake...Hmm. Granted, she was sort of kidding when she asked for it because she knew it would be a hassle to bring in due to the transport and storage problems, and yes, I could probably manage to get it there and keep it in the fridge, but it's a lot easier to bring individual treats that people can just grab on their way in or out of the break room than to have to cut a whole slice. I thought about it for a minute, considered making mini cheesecakes in a mini cupcake pan, and then remembered a recipe I've been wanting to make for a few weeks. So I emailed her back and asked if she would accept cheesecake-filled chocolate cupcakes instead. The reply: a resounding yes. 


Cheesecake is something I came to love slowly. For years, I wouldn't go near it. It was way too cheesy and not the right kind of sweet. I preferred my cream cheese schmeared on a nice fresh (non-toasted!) bagel thankyouverymuch. Thinking back on it, I think everything changed a few years ago when my mom made cheesecake for my stepdad. If he's lucky, she makes it once a year for a special occasion, and that year, she had been talking it up, and I didn't want to slight her by not trying a piece. I figured I would just take a few bites, squash it around on my plate for a while, and leave the mangled mess in an unappetizing heap. So I took the first bite. And then I took another. And another. And then I basically inhaled the whole thing and licked the plate. Don't be so judgey. I couldn't help it; it was SO good. Ever since then I've been more willing to give it a try, usually if someone else orders it or if it's offered as a small petit four. I think my favorite part is still the graham cracker crust, and I really don't like it to be topped with any kind of syrupy fruit, but add a little vanilla bean or maybe a hint of chocolate, and that is just damn near irresistible.  

I get to work at 9 a.m. By 10, almost half of these were gone. I had to hide one in my desk just to save it until after I ate lunch. When I finally took a bite, I was impressed. The chocolate cake had a rich chocolate flavor and was moist, dense, and tender. The whole thing was a bit crumbly, but I take that as a good sign that it clearly wasn't too tough. All that being said, these were a bit...fudgey. The kind of cupcake you really need a glass of milk to wash down.


Flavorwise, chocolate definitely played the part of the cocky lead singer who gets all the girls, while the cheesecake center was more like the quiet and mysterious emo bass player who mumbles something deceptively deep every once in a while. I think I was hoping for a more pronounced cheesecake flavor, but for what they were, I'm rating them a success.

Black-Bottom Cupcakes
Yield: 12 Cupcakes

For the Filling:
8 oz cream cheese, at room temperature
1/3 cup granulated sugar
1 large egg, at room temperature
2 oz bittersweet chocolate, coarsely chopped

For the cupcakes:
1 1/2 cups all-purpose flour
1 cup firmly packed light brown sugar
5 T unsweetened cocoa powder
1 t baking soda
1/4 t kosher salt
1 cup water
1/3 cup vegetable oil
1 t vanilla extract

Make the Filling: Beat together all the ingredients for the filling except for the chocolate, and beat until smooth. Stir in the chopped chocolate. Set aside.

Make the cupcakes:
1. Adjust a rack to the middle of the oven and preheat the oven to 350 degrees. Butter a 12-cup muffin tin, or line with paper muffin cups.

2. In a medium bowl, sift together the flour, brown sugar, cocoa powder, baking soda, and salt. In a separate bowl mix together the water, oil, and vanilla.


3. Make a well in the center of the dry ingredients and stir in the wet ingredients, stirring just until smooth. Stir any longer and you will over mix the batter and end up with less-than-tender cupcakes.


4. Divide the batter among the muffin cups. Spoon a few tablespoons of the filling into the center of each cupcake, dividing the filling evenly (I used a cookie scoop, one that has a handle-triggered release). This will fill the cups almost completely, which is fine.


5. Bake for 25 minutes, or until the tops are slightly golden brown and the cupcakes feel springy when gently pressed.


These moist treats will keep unrefrigerated for 2 to 3 days if stored in an airtight container.

Adapted from The Great Book of Chocolate by David Lebovitz

Given that it's the end of June, you may be thinking to yourself, "Hey didn't she say something a few posts ago about participating in some Daring cooking something or other? Whatever happened to that?" Or maybe you've completely forgotten about it in which case I've just pointed out my complete lack of follow-through when I totally could have gotten away with it.

What can I say? I'm a rebel. Just ask my mom. And if she hems and haws, remind her about the tattoos...

I just couldn't bring myself to make what was chosen this month. It was something very similar to this and I think we all remember how (badly) that turned out. *Shudder* The one promising thing about the challenge recipe was that it was made with lots of chocolate (yay!), but alas, still a meringue (booo!). Frankly, I don't think I'll be baking any more meringue until I'm faced with it in class. Public humiliation that will also be judged by a professional and my (if there anything like me) perfectionist peers?! Can't wait! 

Next Indulgence: Ina's Outrageous Brownies

Monday, June 28, 2010

Soft Pretzels

I'm still in a bit of a mood after having to redesign my blog and having so many problems doing so, but I think I've finally gotten it the way I want it, and now I'm just working on some minor formatting issues that will hopefully be resolved by the time I publish this post. Unfortunately, my camera was still channeling Picasso when I took these pictures, so it was still in its Yellow Period. I think I've finally fixed it though, so stay tuned for less jaundiced pictures, hopefully coming soon.

I know I've turned my focus to desserts, but I kept coming across these soft pretzel recipes on a lot of the food blogs I read. Technically, pretzels aren't dessert (unless you dip them in chocolate frosting or sprinkle them with cinnamon and sugar. Yum!), but they still require baking, so I'm making an exception. I've been lusting over pictures of homemade bread and bagels, and especially homemade pizza dough, on a lot of other food blogs, but I'm missing a few key components that make all of those recipes possible: a dough hook for my mixer and a baking stone.  So although I would love to experiment with all kinds of dough, I decided for my first baking attempt with yeast dough, soft pretzels sounded quick, easy, and most importantly, delicious.


Unfortunately, my pretzels came out with a bit of an inferiority complex. I tried to tell them size doesn't matter, but there was only so much I could do; clearly they are much smaller than your average soft pretzel, but who doesn't love mini food?! They're like little baby pretzels. Plus, you can totally get away with eating two of them at a time and not feel guilty about it, right? Right??

I think the size problem likely has more to do with the yeast I used and less to do with the recipe itself. Although I checked the expiration date on the yeast and it was still months away, it had been hanging around the kitchen for a while and may have just been too old to really be active. It did smell yeasty and seemed to bubble after letting it sit with the warm water and sugar, but after looking at some pictures on other blogs of what active yeast should look like at this stage, I think mine was probably a bit too elderly. I guess I'll have to make this recipe again with yeast I know is fresh, for research purposes, of course. And while I'm at it, I might as well experiment with more toppings and flavorings, too. Cinnamon Sugar? Garlic? Parmesan cheese? Nom, nom, nom.

Size aside, these pretzels had the perfect flavor, exactly what you would expect from any soft pretzel. They were doughy, a little sweet, but also nice and salty. The outside had a prefect soft crust, and the inside dough was even softer, tender, just a little chewy, and completely satisfying. I dipped mine in some yellow mustard which made it even more delicious. I loved the salty crunch of the coarse kosher salt, and probably would have added even more than I did since I like my pretzels extra salty. The bottoms burned slightly, but I think that may have been a defect of the pan or my oven, or maybe because I used parchment paper as opposed to a silpat. The pretzels themselves didn't taste overdone, and even the browned bottoms hardly made a difference in taste, so I don't think it had anything to do with the baking time. This is a great basic starter recipe for easy and quick soft pretzels.

Soft Pretzels
Yield: 6 Pretzels
Source: www.sugarlaws.com

Ingredients
1 tsp active dry yeast
Pinch of sugar
1/3 cup warm water
1 1/4 cups all-purpose flour
2 tbsp white sugar
1/2 tsp salt
1 tbsp canola oil
3 tbsp baking soda
1 cup hot water (as hot as your tap can get)
Kosher salt

Directions
1. Dissolve yeast into water with a pinch of sugar, let stand 10 minutes, until the mixture is creamy colored. 
2. Mix the yeast mixture with flour, sugar, salt and canola oil, and knead until combined (a few minutes, not even 5).


3. Let the dough rise in a greased bowl until doubled in size, about 1 hour.

 Hmm, looks much the same...
4. Preheat the oven to 425 degrees. When the dough has risen, pinch off a handful and roll it out into a long strand. Set aside. Repeat with the rest of the dough, about 6 times.

5. Once all the strands are rolled out, pick up the first one and stretch it out again (the gluten will have relaxed and it should stretch further now). Twist it into a pretzel shape and place it on a baking sheet lined with silipat or cooking spray. Repeat with the rest of the strands.

6. Dissolve baking soda into hot water and stir until dissolved. Quickly dip each rolled pretzel into the mixture and place it back on the baking sheet. Sprinkle all the pretzels with kosher salt, to your preference. 
7. Bake for about 8 minutes, until pretzels have browned.

Best eaten the day they're made.

Next Indulgence: Black-Bottom Cupcakes

Thursday, June 24, 2010

Oatmeal, Peanut Butter, Chocolate Chip Cookies

**Disclaimer: I'll be making some changes around here over the next few days (as you can probably already tell) so if things look a tad...heinous altered, don't worry, I'm working on it! If you have any suggestions or comments about the layout, leave me a comment and let me know!***

When I announced at work that I was fleeing the corporate world to frolic in the great stainless steel kitchens of New York, I suddenly felt like a veil had been lifted. I had of course brought in baked goods to work before, but they were cloaked with the disguise of a hobby, something I just did on the side for fun as opposed to the thing that puts me to bed every night. Because really, if I could, I would bake every single day. Which is exactly the sentiment that leaves me mainlining chocolate chips right out of the bag at 11:00 at night. 

Anyway, when I announced my resignation, I also submitted an invitation for requests; in the last few weeks I was at work, I wanted to bake a few things that people really wanted. One of my co-workers started the trend a few months back by requesting White Chocolate Macadamia Nut cookies, which I happily supplied. And now that I didn't have to be so shy about my love for all things sugary and sweet, I happily entertained another handful of requests. This was my first. It's for my cubicle neighbor, the one who's not a big fan of sweets...

I know. I'm not quite sure what's wrong with her either. She's the type of person who would rather cash in her calories on something salty, namely, potato chips. Me? I'd rather stuff an entire cupcake into my mouth than a handful of potato chips, but often my cravings do fluctuate between salty and sweet (but always end on the sweet side), hence the ultimate pairing created by my sister: plain potato chips dipped in yogurt, preferably berry-flavored. Sounds gross to just about everyone else, but it's so so good. I'm already planning to turn this into a plated dessert I could serve at a restaurant. I'm committed to showing other people just how good this is. YOU WILL TRY IT AND YOU WILL LIKE IT.

Given my neighbor's lack of a sweet tooth, I was surprised when she submitted the first request. She wanted a cookie, made with just oatmeal or oatmeal and chocolate chips, just not raisins. As my mind began to flip through my recipes, I remembered one that looked great, the ultimate trifecta of awesome. And just at that moment, she said the magic words: peanut butter. Oatmeal, Peanut Butter, Chocolate Chip cookies. It was meant to be.

For some reason, my camera is turning everything yellow. I am not amused. It probably doesn't help that my kitchen is a black hole completely devoid of natural light and that I do most of my baking and photographing in the evening. Still, I think I'll blame the camera.

But when I first saw this recipe, I was hesitant. It originally showed up on the back of a flour bag (The only recipe I've used from a name brand product is the Toll House Chocolate Chip cookie recipe, which has been my go to forever, and I truly believe it's one of the best), and I was worried it would be too unfocused; not enough oatmeal to feel like an oatmeal cookie, not enough peanut butter to be a peanut butter cookie, but everything melding together to just be another chocolate chip cookie. Fine in and of itself, but not what I was looking for. I wanted something that when you bit into it, you felt like you were eating a chocolate chip cookie sandwiched between an oatmeal cookie on one side and a peanut butter cookie on the other. And wow, I think I gained 3 pounds just thinking about that one.

With some slight alterations to the recipe, with this one cookie, that was exactly what I got (the flavor part, not the 3 pounds. Not yet anyway). The flavors and textures unfold in your mouth one by one and all at once. The sweet chocolate, the soft chewy texture from the oats, with just a hint of the familiar flavor of peanut butter. No one element overwhelmed the other, and they all complimented each other well, so all your cookie cravings are satisfied.

These looked way cuter in person. Some cookies just aren't that photogenic. 
At least that's what we told them.

You want to be really careful not to overbake these. You want them to be soft and chewy to retain the spirit of an oatmeal cookie. If they get too crunchy, you'll lose the texture and flavor of the oats and be left with a downtrodden chocolate chip cookie that tastes like it spent a scandalous evening with the slutty peanut butter and is now hanging its head doing the walk of shame in last night's party dress.

Oatmeal, Peanut Butter, Chocolate Chip Cookies
Yield: 24 large cookies

Ingredients:
2 cups all purpose flour
2 teaspoons baking soda
1/2 teaspoon kosher salt
2 sticks (1 cup) unsalted butter at room temperature
1 cup creamy peanut butter
1 cup granulated sugar
2/3 cup light brown sugar
1 teaspoon vanilla extract
2 eggs
2 cups rolled oats
2 cups semisweet chocolate chips

Directions:
1. Preheat the oven to 350 degrees. Line two baking sheets with parchment paper and set aside.
2. Whisk together the flour, baking soda, and salt. Set aside.
3. On medium speed, cream together the butter, peanut butter, both sugars, and vanilla, about 3 minutes. Add the eggs one at a time and beat to combine. 


On low speed, gradually add the flour mixture until just barely combined. Stir in the oats and chocolate chips.


4. Shape the dough into 2 oz balls (about 1/4 cup) and drop them onto the prepared baking sheets, about 2 inches apart. 


Bake for 19 minutes, or until the cookies are lightly golden and the edges have started to set. Let cool completely on the baking sheets and then store in an airtight container.

To put it in perspective, that plate is actually white. Not whatever color that is. Old faded newspaper?


Next Indulgence: Soft Pretzels

Sunday, June 20, 2010

Raisin Bran Muffins

I know I said in my last post that New York-Style Coffee Cake would be next, but I'm going to hold off on that recipe for a little while because I may be making some alterations to the recipe. It will give you something to look forward to though, trust me.

There's nothing weirder than a crunchy muffin. And in my opinion, there's nothing worse than soggy cereal. I'm the type of person who waits until the last minute, spoon at the ready, to pour the milk on to my Honey Bunches of Oats, and then starts shoveling it in before I even sit down. But, ironically, it's those gross, soggy, mushy flakes of bran that are the key to this muffin recipe.


Dan was in his last week of studying for the first step of the Boards (or, in his words, the most important test he'll ever take. Clearly, he'll never take a pregnancy test), when he asked me to make him something he could snack on throughout the day, without having to take a break from studying, and that wouldn't put him into a food coma. We settled on muffins and I decided to try these.


After the first bite, I wasn't sure I was going to finish the whole muffin. It was dense, not that sweet, and seemed sort of flavorless. But then, I took another bite, and another. The texture lightened up and the subtle flavor of the bran started to come through. These weren't phenomenal, but they were good. My favorite bites were the ones with the raisins in them since that upped the sweetness factor by about 10 so I changed the recipe to include more raisins if you're looking for a sweeter muffin. If you're feeling really frisky, you might even add a pinch of cinnamon for a little added spice. But this is a solid, easy recipe for a basic bran muffin.  


Raisin Bran Muffins
Yield: 12 Muffins
Ingredients:
1 1/2 cups all-purpose flour
1/2 teaspoon baking soda
1/4 teaspoon salt
1/3 cup granulated sugar
3 tablespoons light brown sugar
2 1/2 cups raisin bran cereal
1 cup raisins
1/3 cup vegetable oil
1 egg
1 1/4 cups buttermilk
1/2 teaspoon vanilla extract
Demerara sugar (Granulated brown sugar)

Directions:
1. In a large bowl, whisk together the flour, baking soda, salt, and sugars. Stir in the cereal and raisins; set aside. It's best to do this by hand as the paddle of a mixer will break up the cereal.


2. In another large bowl, whisk together the vegetable oil, egg, buttermilk, and vanilla.
3. Add the dry ingredients to the wet, folding to incorporate. Cover the mixture with plastic wrap and refrigerate over night or up to 3 days in an airtight container.


4. When ready to bake, preheat the oven to 375 degrees. Line a muffin tin with liners or spray with non-stick cooking spray.


5. Divide the batter between the 12 muffin tins. Sprinkle the tops with the demerara sugar.


6. Bake for 20-25 minute or until a toothpick inserted in the center comes out clean. 


Store in an airtight container at room temperature for up to two days, and then in the refigerator for up to another week.

(Adapted from Joy the Baker)

Next Indulgence: Oatmeal, Peanut Butter, Chocolate Chip Cookies (That's right. The TRIFECTA)

Wednesday, June 16, 2010

Blueberry Cobbler


Summer: ripe berries, juicy peaches and plums...and bathing suits.

Seems cruel doesn't it? Summer rolls around and the local markets are packed with beautiful stone fruit and cartons of all different berries, and what do we immediately do with them? Mix them with sugar and throw them under some buttery, flaky crust. Delicious? Yes. Low calorie? No. Now, it's not like Fall doesn't have its fair share of delicious fruits and vegetables as well: Apple pie? Butternut squash soup? Holiday cookies? Yes please! But at least those delicious morsels have the decency to be accompanied by cold weather that necessitates layers upon layers of clothing. Those extra 5 pounds that have so rudely take up residence around your midsection? Oh, I'm sure that's just the extra 6 sweaters you're wearing today...

Unfortunately, Summer is not so forgiving. But what else are we to do? Just eat plain, fresh fruit? I don't think so. Not when I have so many delicious recipes on my to-do list. It's fashionable to wear mu-mus to the beach now...isn't it?

This was another Memorial Day Weekend recipe, but would be perfect for July 4 or any other warm summer weekend. As with any cobbler, this can be adapted for use with all different kinds of fruit. (One of my favorite combos, particularly for pie, is peach and blueberry.) What is unique about it is the topping. It's more cake-like than the typical biscuit topping you see on most cobblers, which I really liked. It was sweet, but not too sweet, had a nice, soft texture, and was a perfect compliment to the warm, juicy fruit. Serving this with vanilla ice cream is a MUST. Unfortunately, I underbaked this slightly as it was the first time I made it, so although the fruit was perfectly cooked, the topping was still a little underdone, which was a disappointment. I've altered the cook time in the recipe below to reflect what I think may be a better window of cooking time.

Blueberry Cobbler
Serves 8

Ingredients: 

Topping:
1 3/4 cups all-purpose flour
1/2 teaspoon baking powder
1/2 teaspoon baking soda
6 Tablespoons (3 ounces) unsalted butter, at room temperature
3/4 cup plus 1 Tablespoon granulated sugar
2 large eggs
1/2 cup buttermilk
1/4 teaspoon ground cinnamon, or to taste

Filling:
4 pints (8 cups) blueberries
1/4 cup granulated sugar
2 Tablespoons all-purpose flour
1 Tablespoon grated lemon zest

Directions:
1. Preheat oven to 350 degrees.
2. Sift together the flour, baking powder, and baking soda; set aside.
3. Put the butter and 3/4 cup of sugar in the bowl of a stand mixer, fitted with the paddle attachment and mix on low speed to combine, then beat on medium speed for about 3 minutes, until the mixture is light and creamy, scraping down the sides as necessary. Beat in the eggs one at a time until fully incorporated.
4. Add the dry ingredients in 3 batches, alternating with the buttermilk in 2 batches. Scrape down the sides and mix again to be certain all ingredients are combined.


5. Put the blueberries in a large bowl and toss with the sugar, flour, and zest. Spread in an 11-inch square baking dish or a 9 x 13 inch baking pan.


6. Spoon mounds of the batter over the berries, leaving space between the mounds. Combine the remaining 1 tablespoon of sugar from the topping with the cinnamon, and sprinkle over the batter.


7. Bake for about 40-50 minutes, or until the juices are bubbling and the top is golden brown and a toothpick inserted into just the topping comes out clean. If the top starts to become too brown before it is cooked, lay a piece of aluminum foil over the top of the cobbler.
8. Let the cobbler stand for at least 10 minutes before serving with vanilla ice cream or whipped cream. Leftover cobbler can be stored in the refrigerator for up to 2 days.


Adapted from Thomas Keller's Ad Hoc at Home

Next Indulgence: New York-Style Coffee Cake

Sunday, June 13, 2010

Dark Chocolate Chip Scones

My mother is a big scone-lover. That is, she really, really likes scones. Not big, huge scones or anything, and she herself is not big. Just to clarify. I know you all were confused. No? Just me? 

....

So, when I was home over Memorial Day weekend, I tried out this recipe. What was so appealing about it is how simple and easy it is. There are very few ingredients and you don't even need a mixer to make them. The dough also requires very little kneading and is incredibly easy to roll or pat out, which means these scones could be easily whipped up in the morning for breakfast, or when unexpected guests arrive in the afternoon. It's also a great basic recipe that can be adapted to your liking. Blueberries, cranberries, and orange zest? Throw 'em in. Maple syrup, walnuts, and oats? Sounds good to me. But for now, let's start small: CHOCOLATE


In my opinion, these scones were the perfect texture, not too dry or biscuit-like that you need to chug a glass a milk with each bite, but substantial and tender, just how a scone should be. The dark chocolate chips weren't too sweet, so there was just the right balance of sweetness to doughiness. The fam seemed a little hesitant to eat these for breakfast, preferring instead to snack on them throughout the day. Although we're all chocolate lovers, I think the idea of having it in the morning seems a little taboo; we're more of a bagel and schmear kind of family. Or if you're my mother, oatmeal. Blech.

Dark Chocolate Chip Scones
Yield: 8 scones

Ingredients:
1 and 1/2 cups, plus 2 Tablespoons all-purpose flour, plus more for dusting
1/4 cup granulated sugar, plus more for sprinkling
2 teaspoons baking powder
pinch of salt
1 cup dark chocolate chips
1 cup chilled heavy cream
1 Tablespoon butter, melted

Directions:
1. Heat oven to 375 degrees. Lightly grease a baking sheet.
2. Stir together the flour, 1/4 cup of sugar, baking powder, and salt in a large bowl. Stir in the chocolate chips.
3. Stir the cream into the flour mixture, stirring just until ingredients are moistened. 
4. Turn the dough out onto a lightly floured surface. Knead gently until a soft dough forms (about 2 minutes). Divide the dough in half and then in half again so you have 4 equal portions and roll each into a ball. One ball at a time, use your hands or a small rolling pin to flatten and shape each into a square about 4 inches by 4 inches. Cut the square in half so you have two triangles. Transfer the triangles to the prepared baking sheet, spacing about 1 inch apart. Brush with melted butter and sprinkle with additional sugar.
5. Bake 15-20 minutes until lightly browned. Serve warm or at room temperature, sprinkled with powdered sugar, if desired. Store in an airtight container for up to 3 days.

Next Indulgence: Blueberry Cobbler

Monday, June 7, 2010

Blondies

I have something really terrible to confess. It's just been eating me up inside and I've been sneaking around trying to hide the evidence, but I just can't anymore.  I feel guilty and dirty and need to just let it all out.

I've been cheating. 

I know, I know, I feel terrible about it but I just haven't been able to help myself. I was seduced. And not just once. A few times now. I just can't stop thinking about my new found interest, wanting to spend all our time together. It's new and exciting, but at the same time, comforting and familiar. I've just been so frustrated and disappointed recently and this new relationship is so easy and satisfying.

I'm confused and don't know what I really want. Will I be a failure if I give up on the relationship I have now? Maybe we just need some time apart, a little break to decide what we really want and if we're really right for each other. I mean, we've had some really great times. Amazing even. But lately, I just haven't felt the spark. And I let my eyes wander.

I've been quiet up until now, sharing this with almost no one, but I have to stop living a lie and be honest.

You see, I've been baking other recipes.

I finally found some other food blogs I like, and I just couldn't help it! Everything they were making looked so good that I just started collecting recipes left and right, wanting to try every one to find the best.

And last week, with the failure of that first batch of chocolate cookies I found myself thinking that it might be the last straw for Indulge. I was cursing it as I tried to pry the first batch of soft dough from the parchment paper, and my mom said exactly what I was thinking: "I don't know about this book..."

The new recipes I've begun collecting are different than those in Indulge. They're mostly crowd pleasers meant to be made by the amateur home cook rather than upscale or complicated recipes, but that's part of the appeal. I love baking something that can make just about anyone smile and lick their lips, considering just how bad it would be to have one more piece. I'm sure I'll learn so many new techniques and the basics for making all kinds of desserts once I start school, but for now, I'd love to have a few basic recipes in my back pocket that I can just whip up easily when I need a great basic chocolate frosting, or the best chocolate chip cookies, or moist and delicious cupcakes to bring to someone's birthday, or just something that inspires me to create my own recipe.

I've made a few things over the past few weeks and I want to share them with you along with the recipes, all of which I've tweaked somewhat. Unfortunately, I don't have many or sometimes any pictures of them since I was baking them for "fun" as opposed to "blog baking,"  but I can certainly tell you about them and get your mouths watering. I'm not sure if I just need a break from Indulge or if this will be a permanent change as I make the transition into a teeny tiny apartment (and kitchen) and into culinary school, but we'll see...

A couple of weeks ago I was scrolling through recipes, salivating, and started craving something sweet. I knew I wanted to bake something and bring it into work, and I wanted it to be irresistible, but I couldn't quite put my finger on what it was that I wanted. It took me a while, but I finally realized that what I really wanted were Blondies. The name's pretty fitting, don't you think?

If you've never had a Blondie, they're sort of like a cross between a brownie and and a chocolate chip cookie; soft and chewy like a brownie but with the flavor profile of a chocolate chip cookie. Sounds good, right? A lot of people add coconut or different kinds of nuts to theirs, which is perfectly fine, but I just like to add some butterscotch for a little something special. And if I'm feeling really bad, peanut butter.

I made these and brought them into work and they got rave reviews. Even my co-worker who doesn't really like sweets had to go back for seconds, and another commented that she could easily see paying up to $3 for a generous serving from any standard bakery. These were the treats that got people suggesting I should try out for the Food Network or consider culinary school. Little do they know...

Photo courtesy of Colette's Bakery

Blondies

Ingredients:
12 Tablespoons butter at room temperature, plus more for the pan
1 1/2 cup flour
1 teaspoon baking powder
1 teaspoon kosher salt
1 cup light brown sugar
2/3 cup granulated sugar
2 large eggs
1 teaspoon pure vanilla extract
1/2 cup butterscotch chips
1/2 cup semisweet chocolate chips

Directions:
1. Preheat oven to 350 degrees. Butter a 9 x 9 inch square pan and line the bottom with parchment paper.
2. In a medium bowl, whisk together the flour, baking powder, and salt. Set aside.
3. In the bowl of an electric mixture, cream the butter and both sugars until light and fluffy, about 3 minutes. 
4. Add eggs and vanilla, beating until well combined.
5. Add the flour mixture gradually, beating on low until just combined.
6. Fold in the butterscotch and chocolate chips.
7. Pour the batter into the prepared pan, using a rubber spatula to smooth the top. Bake until the surface is golden brown and a toothpick inserted in the middle of the pan comes out barely clean, about 45-55 minutes. Transfer to a wire rack to cool.

Adapted from Martha Stewart Living.

Next Indulgence: Dark Chocolate Chip Scones

Thursday, June 3, 2010

Mint Chocolate Chip Ice Cream Sandwiches

I spent awhile thinking about what to make for Memorial Day weekend. I was going to Virginia Beach with a bunch of my family, including my nephews who are 1 and 3 years old. I wanted something fun, casual, but delicious, and since I was going to be at my mom's with full access to an ice cream maker, these Ice Cream Sandwiches seemed perfect. 

When my sister was in college, she and her roommate came up with the delicious idea of buying "break and bake" cookies or pre-made cookie dough, baking it, and using store bought ice cream to create homemade ice cream sandwiches. There's nothing hugely innovative about this, but with all the different kinds of pre-made cookie dough and Ben and Jerry's ice cream, the great part about this idea is that they're fast and easy to make and the possible flavor combinations are endless. (My favorite: sugar cookies with oatmeal cookie dough ice cream. So perfect for Fall!) 

Since this recipe calls for the use of 18 individual ring molds which I don't have and have no interest in investing in, I knew I was going to make some modifications, one of which was to use my sister's method for making the sandwiches: make the ice cream but keep it soft enough to squish between two cookies, then freeze the whole thing together.

To start, I made the mint chocolate chip ice cream. Here are the ingredients:

spearmint, whole milk, egg yolks, caster sugar, heavy cream, dark chocolate, green food coloring

First, I infused the milk and cream with the spearmint. Spearmint is sweeter and a little milder than peppermint, which is why it's used in this recipe. I was lucky enough to get some from my mom's garden.


Now, here is the first modification I made. In reality, I could have made this recipe at my house, even without an ice cream maker, since there's no need for one as the recipe is originally written. What Clark suggests you do is make the custard using just the milk, whipping the heavy cream separately, and then folding the two together before filling each ring mold with some of the parfait mixture and freezing it. Once frozen, each individual ring of ice cream gets sandwiched between two cookies. The upside: no ice cream maker. The downside: 18 ring molds. So instead of doing it that way, I just made this like a typical ice cream.

I brought the milk, cream, and mint to a boil, took it off the heat and let it steep for 10 minutes. I brought it back to a boil and then passed it through a fine sieve. 


I mixed the egg yolks with sugar and with the help of a sous chef, slowly stirred in the hot milk. 


I returned this mixture to a clean pot and put it over low heat, cooking and stirring constantly until it thickened enough to coat the back of a spoon, which took FOREVER.

You know the mixture is thick enough when it coats the back of a spoon and you can run your finger down the middle without the sides running back together

Once the custard had thickened, I passed it through another sieve into a clean bowl and put it in the fridge to chill overnight.

The remnants

The finished custard

The next day, I needed to make the cookies and finish the ice cream. I got sort of a late start, so there wasn't much room for error.

And here, of course, is where the shit hit the fan. 

The ice cream went off without a hitch; I just put it in the ice cream maker with the chopped dark chocolate, about 3 drops of green food coloring, and let it do it's thing.


The cookies, however, were another story. Let's start at the beginning. Ingredients:
butter, powdered sugar, an egg, flour, cocoa powder, almond flour

I let the butter sit at room temperature so it was soft and then creamed it with the powdered sugar. I added the egg and that's when disaster struck. The egg was still cold from the fridge, so when it hit the butter, it cooled it, causing the butter to re-solidify. This does not make for a particularly creamy texture. I was so annoyed with myself, and annoyed that this had happened. I know most chefs hem and haw about having all your ingredients at room temperature, and they're probably right (clearly), but this has never ever been a problem for me. I didn't think there was any saving it, so I took out more butter AND AN EGG and let it all sit at room temperature for a few hours. Of course, it was even later in the day by the time the butter was soft, and I was starting to worry I wouldn't have enough time to bake the cookies, let them cool, make the sandwiches, and let them set up in the freezer. 

Finally, the butter was soft and the egg felt about room temperature, so I repeated the process of creaming the butter and sugar, and then added the ROOM TEMPERATURE egg. And you know what?

IT HAPPENED AGAIN! What the hell Claire?! Your recipe sucks!

There wasn't anything I could do about it at that point, so I just beat the hell out of it with my mixer and kept going.

 
While I was beating THAT into submission, I sifted both flours and the cocoa powder together into a separate bowl.


I added the flour mixture to the butter, and mixed just to incorporate, finishing it by hand. 


I turned the dough out onto a piece of parchment paper and covered it with another. Using a rolling pin, I rolled the dough out to about 1/4 of an inch. The dough was very soft which made it easy to roll, but the confines of the parchment paper made it a little difficult to get a uniform thickness. 


I put the dough, still in the parchment paper, onto a baking sheet and put it in the fridge to chill for 2 hours. After that time, I lifted the top sheet of parchment off and using a pretty flower cookie cutter, began cutting out the dough to make the cookies.
Sadly, this is the last picture you'll see of this dough.

I made the imprints with the cookie cutter just fine, but when I tried to lift each one up, they were soft and stuck. The dough had not hardened nearly enough so it was impossible to pick up without destroying the cut out cookies. I knew I had to move fast, but I was getting more and more frustrated, which wasn't helping. I got about 3 cookies cut out and onto a baking sheet, cussing up a storm (under my breath of course as my mother was in the next room and doesn't appreciate foul language in her kitchen) and put them in the oven. With the rest of the dough, I re-rolled it and put it in the freezer. I did this whole process I think 3 times and only got about 14 cookies. There were 11 of us coming for dinner, so that meant only 7 sandwiches. Finally, I gave up and just put the last sheet of dough in the oven, intending to cut out the cookies once it was fully cooked. By this time, the first batch of cookies I had baked were out of the oven and I was curious to see how they tasted. I tried a little crumb and crinkled my nose. 

These weren't even good! They were bitter and flavorless, not at all chocolate-y. I had my mom, sister, and friend Kamyle try a piece each. My mom probably said it best when she described them as chocolate shortbread. But shortbread should be sweet and buttery, and this was bitter and gritty. 

And yes, I had done all this work and believe me, it was WORK, but I just couldn't face serving something that was mediocre. The ice cream was great (my mom and I tasted it before putting it in the freezer) and I just couldn't bare the thought sandwiching it between these crappy cookies. Why didn't I just serve the ice cream, you might ask? Because there wasn't enough. Since it's not really meant to be eaten in a bowl, the recipe only made about a pint, which is not enough for dessert for 11 people, even if one of them is 3 years old.

A few weeks before Memorial Day, my mom and I had been discussing the menu for the weekend and she had dropped a pseudo hint about making these chocolate cookies that she loves. I kept that in the back of my mind and sort of wanted to make them, but didn't want to go over the top baking up a storm (I had also baked homemade scones, recipe to come!). But when I was faced with this crisis, they were all I could think about. They're super chocolate-y, thick, soft and chewy, and sturdy enough to be made into an ice cream sandwich. They're also super easy and quick to make. 

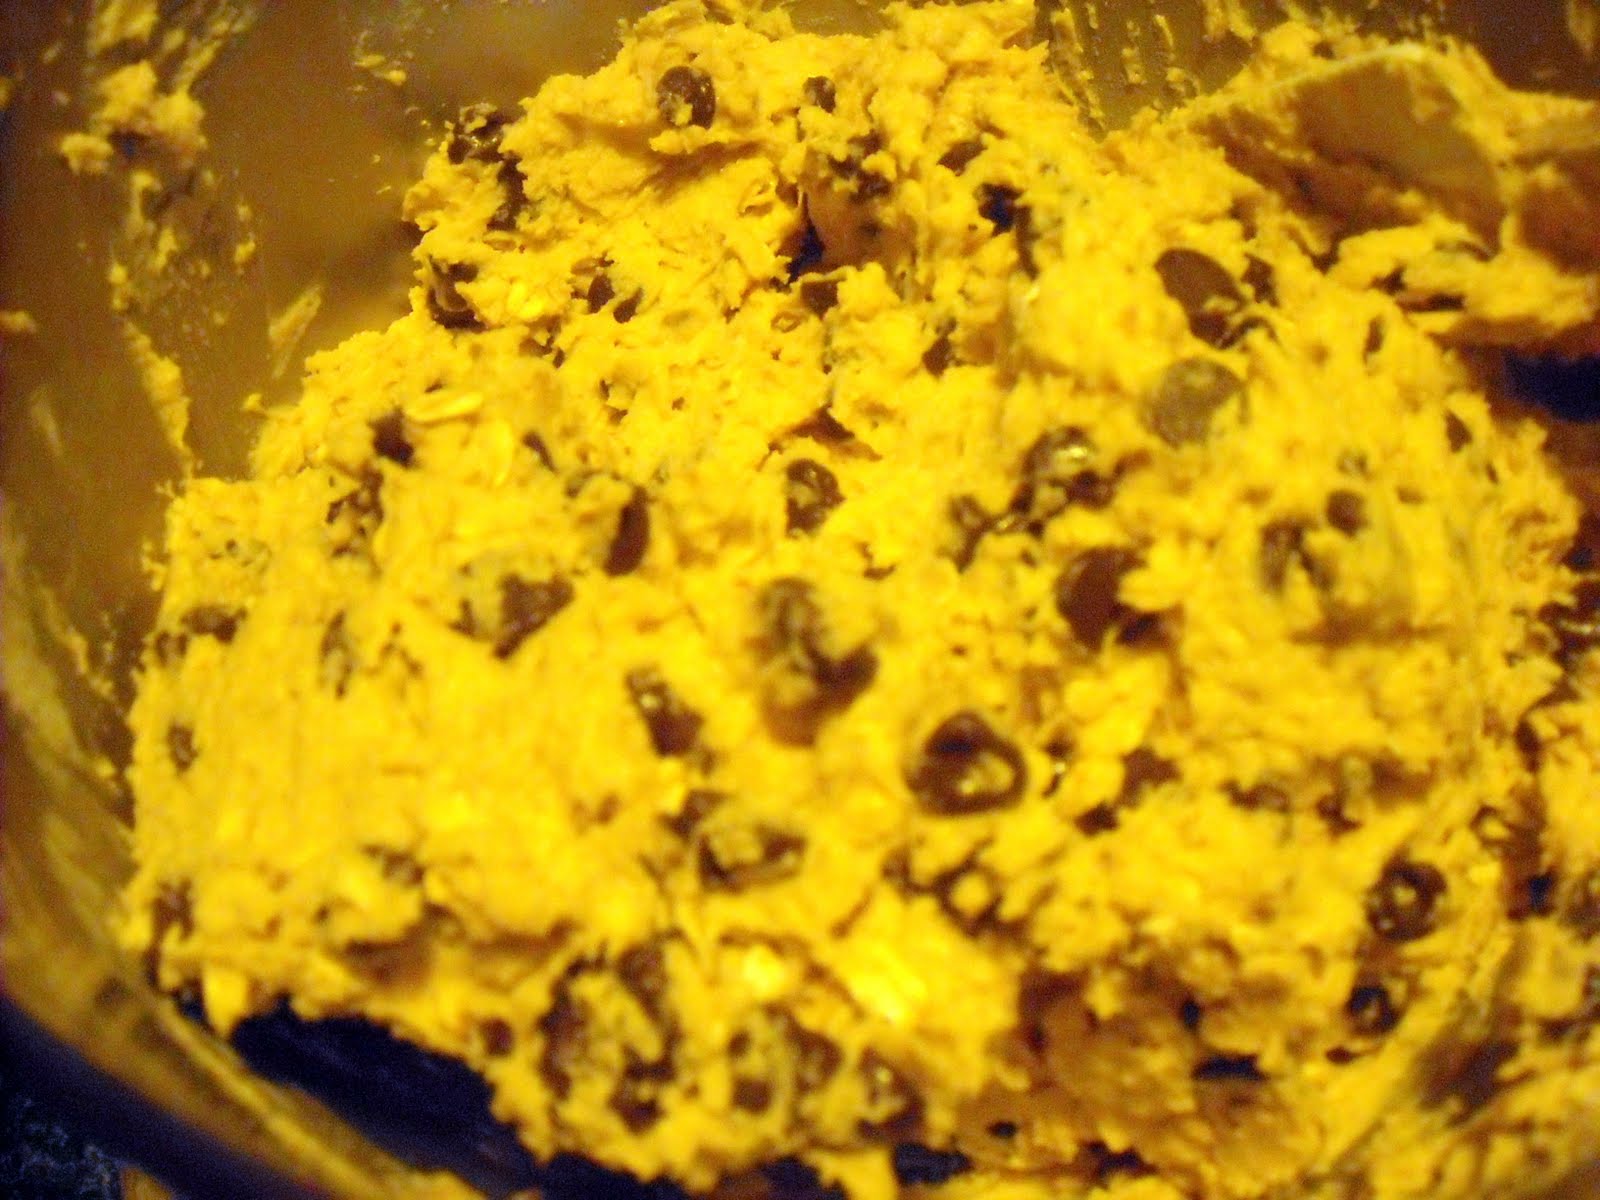
So into the trash went the original chocolate cookies and out of the oven came these:


Although these cookies were easy to throw together, they still took up some time, so by the time they were out of the oven, it was almost dinner time and I really needed to get the sandwiches into the freezer. I had taken the ice cream out to soften slightly so it could be squished without breaking the cookie. I also put the cookies in the freezer for a few minutes to cool them down so they didn't melt the ice cream. Finally, I sandwiched the ice cream between the chocolate cookies, making more than enough sandwiches for all of us, and threw them in the freezer until after dinner. 

I didn't get a picture of all the sandwiches together because half of them were gone before I could get my camera, but here they are in all their chocolate, mint glory:


As I said before, the ice cream was absolutely delicious. There was just enough mint, which was balanced by the sweet custard, and the dark chocolate added just the right flavor and crunch. I don't even typically like the combination of mint and chocolate (or anything and chocolate), but the subtle mint flavor in these was just enough. The cookies were nice and chocolate-y and stood up well to the ice cream without overpowering the light mint flavor. 

And just because these chocolate cookies are so good (and because they're not from my blog cookbook, which I am HATING right now) I'm gifting you with the recipe. Go make them. Now. Really, right now.

Totally Chocolate Chocolate Chip Cookies
Makes about 2 dozen cookies

Ingredients: 
4 oz semi sweet chocolate, melted
1 cup flour
1/4 cup unsweetened cocoa, sifted
1 teaspoon baking soda
1/2 teaspoon salt
1/2 cup (1 stick) soft butter
1/2 cup light brown sugar
1/4 cup granulated sugar
1 teaspoon pure vanilla extract
1 egg
2 cups semi sweet or dark chocolate chips (or a cup of each)

Directions:
1. Preheat oven to 325 degrees. 
2. Measure the flour, cocoa, baking soda, and salt into a medium bowl, whisk to combine, and set aside.
3. Cream the butter and two sugars in the bowl of an electric mixer until light and creamy. Add the melted chocolate and mix to combine.
4. Beat in the vanilla extract and egg, and the mix in the dry ingredients. Finally, stir in the chocolate chips by hand.
5. Drop rounded tablespoons of dough onto two parchment- or silpat-lined baking sheets.
6. Bake for 14-15 minutes or until the tops just start to crack. They should still look very soft.
7. Leave to cool on the baking sheet for 3-4 minutes, then transfer them to a cooling rack to harden as they cool.

Adapted from Nigella Lawson's Nigella Express 

Next Indulgence: Possibly a change of pace...
 
Related Posts Plugin for WordPress, Blogger...