I'm here, I'm here!
I did not get blown away in the hurricane-
but all my power did. Sad face.
That means...
No cooking
No working fridge or freezer (OMG 3 lbs of farm-direct meat!!)
No hot water
No air conditioning
No lights
No internet (ahhhh)
No charging anything battery operated
It's a wonder I survived as long as I did. Our power is still not on (and probably won't be coming back on until at least Saturday), which is such a bummer because I had something amazingly delicious planned. It involves cream cheese dough. And chicken. Believe me, it's going to be good.
Of course, stupid me, in total denial about the veracity of this itty bitty thing called a hurricane, I went ahead and roasted the chicken and made the dough on Friday, thinking I would finish the meal and blog about it Saturday.
Mother Nature had other ideas. So, all that prepped food is currently chilling (literally) at Dan's parents' house, along with the 2 pounds of ground beef and 1 pound of andouille sausage we had ordered specially from a local farm. I'll be heading over to their house tomorrow to cook that up into something that can probably just go back into their freezer until we have our power back. If it turns out well, it will definitely be making an appearance here.
Plus, you'll want to stay tuned for that chicken and dough dish. Believe me, it's a winner and is on the chopping block as soon as my stove is up and running!
Tuesday, August 30, 2011
Wednesday, August 24, 2011
Doughnut Muffins

Since I was dangerously close to eating cupcakes for breakfast this week, I figured I should make something that I could actually justify eating at 8 am.
Enter: Doughnut Muffins. The bastard love child of a cake doughnut and a coffee cake muffin. So wrong, they're right.

These have been on my To Bake list for a while now and I'd collected three different recipes to try out. Although each recipe was different, they all had two things in common: nutmeg in the batter, and the essential final step of rolling the baked muffins in melted butter and cinnamon-sugar.
Doughnut Muffin #1

This recipe was butter-based with lots of brown sugar. I love cookies that use a lot of brown sugar, so I had really high hopes for this recipe. And flavor-wise, of the three recipes I tested, these tasted most like a doughnut. But they came out with flat tops and looking too brown with a tough outer crust and a somewhat dense texture. It's possible that I overbaked them even though I used the minimum baking time suggested.
Doughnut Muffin #2

This recipe was also butter-based and was your basic plain muffin batter. Of the three, these muffins had the best texture. They were super light and fluffy, and were a pretty light golden color. But the tops of the muffins were still flat, and with so little flavoring in the batter, I thought it tasted a little egg-y. Dan likened them to coffee cake, which sounds about right. In the end, I dubbed these the best of the three and dropped some off at our neighbors.
Doughnut Muffin #3

Unlike the other two, these were oil-based with no butter in the batter. They crowned nicely, with high tops but the batter never really smoothed out so the tops were uneven. They took much longer to bake than the recipe suggested, and had a crunchy exterior, but the interior stayed a little gummy. I could also really taste the difference the oil made. These were my least favorite, and after sampling, ended up in the trash.
In the end, I took the flavor inspiration from #1 and combined it with the great texture of #2 (plus the addition of cinnamon in the batter from #3) and came up with my own recipe, which I am totally in love with. To me, it tastes just like a cake doughnut but with all the ease of baking a muffin!

Doughnut Muffins
Makes 12 muffins
Ingredients
For muffins:
12 Tbsp (1 1/2 sticks) unsalted butter, at room temperature
1/4 cup granulated sugar
1/2 cup plus 2 Tbsp light brown sugar
2 large eggs
1 tsp vanilla extract
13.5 oz. (3 cups) all-purpose flour
2 1/2 tsp baking powder
1/4 tsp baking soda
3/4 tsp salt
1/2 tsp ground nutmeg
1/2 tsp ground cinnamon
1/2 cup plus 3 Tbsp milk
2 Tbsp buttermilk
For dipping:
4 oz. (1 stick) unsalted butter; more as needed
1 cup sugar
1 Tbsp ground cinnamon
Directions:
1. Preheat oven to 350°F. Grease a standard muffin tin with non-stick spray (or butter and flour). Be sure to grease inside the cups as well as the top of the muffin pan.
2. In a stand mixer fitted with the paddle attachment, cream the butter with both sugars. Beat in the vanilla extract and the eggs, one at a time.
3. In a separate bowl, whisk together the flour, baking powder, baking soda, salt, nutmeg, and cinnamon. In a small bowl or measuring cup, combine the milk and buttermilk.
4. With mixer on low, add a quarter of the dry ingredients into the butter mixture. Add half of the milk mixture. Continue mixing in the remaining dry and wet ingredients alternately, ending with the dry. Mix just until combined, finishing by hand if necessary.
5. Fill each muffin cup just to the top with batter. Bake the muffins until a toothpick inserted into the center comes out clean, about 24 minutes. Allow to cool 3-5 minutes and then remove from muffin tin onto a cooling rack.
6. For dipping: melt butter and place in a medium bowl. In another bowl, mix together the sugar and cinnamon. While muffins are still warm, roll each muffin in the melted butter, coating the top and all sides. Transfer to the cinnamon-sugar mixture, and roll to coat the muffin completely. Leave on cooling rack to cool completely.

Tuesday, August 23, 2011
As California shakes its head in dissapointment
In case you didn't hear (in which case, you must live in a cave and I'm very impressed you found your way to my blog), but there was an earthquake today. Since I live in Richmond, the epicenter was less than 40 miles from my house, and with all the CNN coverage, you'd think the whole East Coast was crumbling into the ocean. Let me try to put it into perspective for you: when it started, I was blow drying my hair and thought our dryer was bouncing around and causing the floor to vibrate. When it got a little stronger, and Dan ran into the nearest doorway (earthquake survival: fail) with an adrenaline-fueled grin on his face, I realized that perhaps, it was a little something bigger. But by the time we figured out what was really happening, it was over.
Really guys, it was not that serious.
Of course, that didn't stop Dan from running out to the Fire/EMS station in case anything else catastrophic happened. It's not like he had surgery yesterday, or anything. Oh, wait....
It also didn't stop me from going to the grocery store for more milk so I could make three versions of the same muffin. There was lots of sampling. And now I feel nauseous. But more on that tomorrow (the muffins, not the nausea).
Monday, August 22, 2011
Matzoh Ball Soup

Ah, the healing powers of soup.
Dan had one of his wisdom teeth removed today. In his groggy, anesthesia-induced stupor he had one request: Matzoh Ball Soup. I hoped he might forget this particular conversation once we got home, but after an afternoon nap, and several bowls of ice cream, he was still jonesing for it.
Luckily, mine is not a homemade matzoh ball soup family. Don't get me wrong, we certainly aren't a canned matzoh ball soup family either. We're a boxed soup family. Sort of like cake mix, you get all the dry ingredients you need for the matzoh balls and you just add the wet. Every year my sister is in charge of making the matzoh balls for Passover, so I'm no expert, but I did my best. One day maybe I'll try a truly homemade version. Ina's looks pretty good.
But for now, I'm sticking with what I know.
Let's get started. Open that mix. Add eggs and oil.

Mix it up. Cover and chill.

Roll, roll, roll!

Plop 'em in some boiling water (with just a little of the included "soup mix"). 20 minutes later, you have matzoh balls!
Add them to your favorite chicken soup. Eat it up and feel better.
Saturday, August 20, 2011
Lemon Blueberry Cupcakes

Six things this Saturday.
1. I hate fresh blueberries. I hate the texture, and I even hate the flavor. They're like gross little balls of mush. But I love cooked blueberries. Blueberry muffins, blueberry cobbler, peach blueberry pie. Even blueberry yogurt. Bring. it. on. Just not with the fresh blueberries.
2. A cupcake without the frosting is really a muffin! Which means you can totally eat these for breakfast. Although, the icing has cream cheese in it. Breakfast food- bonus!
3. I found a lost dog yesterday morning. Well, actually, she found me. Then we found her owners. But not before she got to have a playdate with our dogs. She was sweet.

4. There is a mixing bowl full of this icing sitting in my fridge. I'm not really sure what to do with it or how to dispose of it. So there it sits. Taunting me.
5. I was going to bring these to our neighbors as a thank you for helping us move in...2 1/2 months ago. But since they didn't turn out exactly as I'd planned, they're getting brownies. More specifically, Ina's Outrageous Brownies. I hope they're not disappointed.
6. It will seem like there is a lot of sugar in this frosting. That's because there is. Don't fight it. The fruit in the cake totally makes up for it.

Lemon Blueberry Cupcakes
Yields 16 cupcakes
Ingredients
For the cupcakes:
¾ cup plus 2 Tbsp all-purpose flour, divided
¾ cup cake flour
1½ tsp baking powder
¼ tsp salt
8 Tbsp unsalted butter, at room temperature
¾ cup plus 2 tablespoons sugar
Zest of 1 lemon
2 large eggs, at room temperature
1 tsp vanilla extract
2 Tbsp lemon juice
½ cup milk, at room temperature
1 cup fresh blueberries
For the icing:
8 oz. cream cheese at room temperature
5 Tbsp unsalted butter, at room temperature
1/3 cup fresh blueberries
1 Tbsp freshly squeezed lemon juice
Zest of 1 large lemon
1 lb confectioners’ sugar, sifted
1. Preheat the oven to 350˚ F. Line cupcake pans with paper liners.
2. In a medium bowl, combine the ¾ cup all-purpose flour, the cake flour, baking powder and salt; whisk together and set aside.
3. In the bowl of an electric mixer fitted with the paddle attachment, combine the butter, sugar and lemon zest. Beat together on medium-high speed until light and fluffy, about 2-3 minutes. Beat in the eggs one at a time, blending well after each addition. Beat in the vanilla and lemon juice.
4. Add half of the dry ingredients and mix on Low speed until almost incorporated. Add the milk. Add the remaining dry ingredients, beating until almost incorporated.
5. In a small bowl, toss the blueberries with the remaining 2 tablespoons of all-purpose flour. Using a spatula gently fold the berries into the cake batter, fully incorporating all the dry ingredients.
6. Divide the batter evenly between the prepared liners, filling each about 3/4 full. Bake 20 minutes, or until a toothpick inserted in the center comes out clean. Let cool in the pans 5 minutes, then transfer to a wire rack to cool completely.
7. To make the frosting, combine the cream cheese and butter in the bowl of an electric mixer fitted with the whisk attachment. Beat on medium-high speed until well combined and smooth, about 2-3 minutes. Mix in the blueberries, lemon juice, and zest. Gradually beat in the confectioners’ sugar until totally incorporated, increase the speed and then beat until smooth. Frost cooled cupcakes as desired* and store in the refrigerator.
*This icing is a little thin, so it's not the best for piping. I simply smoothed mine on with an offset spatula and garnished with an extra blueberry.
Source: Annie's Eats
Wednesday, August 17, 2011
Espresso Oreo Ice Cream

A few weeks ago, we made a special trip to a particularly good ice cream parlor in Carytown called Bev's.

It was hot. Like, over 100 degrees hot. So hot that someone came home and eaten almost all the ice cream left in our freezer.
So that someone had the pleasure of driving me into town so I could get my fix. We've been to Bev's a couple of times and I always appreciate that their ice cream is homemade and that they experiment with new flavors. On this particular trip, I sampled Sweet Corn ice cream and Strawberry Balsamic.
But I was craving chocolate so I ordered one of their signature flavors: Espresso Oreo.
I was a bit skeptical at first, because I'm not really a coffee lover. I love the smell of coffee, but I hardly ever drink it. My
I'll drink coffee if it's loaded with milk and chocolate. Sort of like chocolate milk with a little splash of coffee. But generally, I go without it, which is probably why I'm such a joy to be around in the morning.
But enough about me, let's talk about this ice cream. Because it was yummy.

Great coffee flavor, not too bitter, with those irresistible chocolatey, crunchy Oreo chunks. And yes there was a waffle cone. Really, is there any other way to eat ice cream in the summer? I think not.
Since I sort of fell in love with this ice cream and thus, need it in my life as much as possible (and since not everyone can live as close to Bev's as we do), I came up with a homemade version. Not a perfect replica, but a close second. Crumble an extra Oreo on top. Don't be sorry.

Espresso Oreo Ice Cream
Makes about 3 pints
Ingredients:
1 quart heavy cream
1 cup granulated sugar
8 egg yolks
3 T ground coffee
2 cups Oreo pieces (or about 12 cookies, chopped)
Instructions
1. In a heavy-bottomed sauce pot over medium to medium-low heat*, combine heavy cream, half the sugar, and ground coffee. Bring to a boil. Cover and remove from the heat. Allow to steep for 10 minutes.
2. Meanwhile, in a medium bowl, whisk together egg yolks and remaining sugar.
3. Return the cream to a boil. Remove from the heat. Working about 1/4 cup at a time, add a third of the hot cream to the egg yolks, whisking to incorporate.
4. Whisk the yolk mixture back into the pot with the remaining heavy cream. Return to low heat.
5. Using a wooden spoon, stir mixture constantly until it thickens. Timing for this will vary; use a low heat, and be careful not to let the mixture boil again. Your custard is ready when it coats the back of the wooden spoon and you can create a definitive line down the center with your finger.
6. Line a fine mesh sieve with cheesecloth or a coffee filter and set it over a clean bowl. Pour the custard through the lined sieve to strain. Use a ladle to help push it through if necessary. Set the bowl over an ice bath (you can later transfer it to the fridge). Allow to cool completely.
7. Process in an ice cream machine until it is the texture of soft serve. Add the Oreo pieces in the last 1-2 minutes of churning. Transfer to a sealed airtight container and place it in the freezer to set fully, about 4-6 hours or overnight.
*Don't be tempted to turn the cream up to high to get it to boil. It won't heat evenly and the cream on the bottom will burn before it boils. Watch carefully, and use a pot large enough to ensure it doesn't boil over.
Tuesday, August 16, 2011
How to Cook (and eat) an Artichoke

We all love spinach artichoke dip, yes?
But have you ever eaten a real, live artichoke?
Ok, maybe it's not alive. But it's fresh! And all in one piece and not smothered in cheese. Wait, why are we doing this again?

Oh right, the butter.
I grew up eating artichokes. My mom would serve them from every time she found good ones at the store and my sister and I always thought of them as special treats. Picking off the leaves one by one, dipping them in delicious, salty butter, and then shoving the mangled mess at my mom to clean the creepy hairy heart. It was like the seafood-hating, child-friendly version of picking crabs or lobsters (which totally creeps me out. They have eyes! And yes, I know cows and chickens have eyes at some point too, but I'm not the one tearing apart their bodies with my own two hands, and if I was, I would probably be a vegetarian).
You're probably aware that artichokes have hearts. You can buy them already nicely prepared canned, frozen, or jarred. But did you know that they're hairy. Don't panic. I'm here to help.
How to Cook (and eat) an Artichoke
Step 1: Pick a good one.
Look for medium- to large-sized artichokes. They should be a nice green color, on the lighter side, with few brown spots. The leaves should be nice and tightly closed. Pick up one artichoke for each person.
Step 2: Clean and Prep.
Rinse the artichokes in cool water. Cut the bottom inch off the stem. Using a serrated knife, cut the top inch or so off the artichoke. This will take off the sharp points on the very top leaves. Using a sharp pair of kitchen scissors, snip off the pointy tips from the rest of the outer leaves (Check out the picture at the top of this post for what they should look like when they're prepped).
Step 3: Cook 'em up.
Place a metal steamer basket in the bottom of a large pot. Add enough cold water to fill the bottom of the pot, but not enough to come through the holes of the steaming basket. Add artichokes and cover. Bring water to a boil, and reduce heat to medium or medium-low (basically you want the water to continue to produce steam but not completely boil away before the artichokes are cooked. If you find that that is happening, just add more water). Steam for about 25 minutes for medium artichokes, or until you can easily pierce the stem with a sharp knife.

Step 4: Eat!
Eating artichokes is a bit of a process but a fun one. I think they're best served as an appetizer. And with lots of napkins.
First, remove the lowest, outer leaves and discard them.

Then, starting with the bottom layer, pick off a leaf.

See that little meaty section at the bottom? That's the good stuff. I like to dip that bottom portion in salted butter or sprinkle it with just a flake or two of sea salt (or you can just eat it plain).

Use your top front teeth to scrape off the "meat."

Be careful not to bite too far up the leaf; you just want that little 1/2 inch lump at the bottom.


These leaves will be thin and wimpy. Pull off all the small thin leaves until you reach the heart.

Step 5: Cleaning the heart.
First, cut off any of the stem that's remaining at this point. Then, starting from the outer edge, using a spoon or a small paring knife, scrape out the tiny leaves that form that pyramid on the top, until you've exposed the "hair."


Continue to scrape from the outer edge, removing the hair as you go. If you're using a knife, I like to run it through a folded napkin as I go, to catch all the discarded hairs

Keep on going. When I was little, I always had my mom do this for me. I had an irrational fear that these little hairs were sharp and would stab my little fingers. Plus, I was lazy.

Finally, (and you'll get faster the more times you do it) you get a nice clean heart.

I like to trim away some of this green stem on the side too.

Now dip this whole little lovely in moooore butter and enjoy the fruits of your labor.

Monday, August 15, 2011
Dining al fresco
Dinner tonight:

Whole wheat penne with pesto, made from our homegrown basil.
Fun fact: when I was little, I called it "Peeny" pasta, which my mother found endlessly entertaining. Almost as entertaining as repeating this to all the boyfriends I ever brought home.
And in the amount of time it took us to finish our small salads and large pastas (maybe 15 minutes; we're fast eaters), I received no less than 6 mosquito bites.
Dan got away scot-free (I totally had to look up how to spell that correctly, fun fact #2). I don't think we'll be dining al fresco again anytime soon.
Sunday, August 14, 2011
Tzatziki

What's a good way to use up a big container of Greek yogurt that's been hiding out in the back of your fridge for oh, say, a month?
Load it up with garlic, cucumbers, and dill.
Serve it with toasted pita and some of this.
And no, even though it was expired when we opened it, we did not die. Or spend the night on the bathroom floor. I haven't done that since second year of college. For the record, I blame the ill-fated choice to take dramamine, not the buckets of rum I consumed.

Tzatziki
Ingredients:
17.6 oz greek yogurt (preferably not expired)
1 large clove garlic, grated
2 Tbls plus 2 tsp chopped fresh dill
1/4 tsp kosher salt
1 cucumber, peeled and diced
Directions:
1. Transfer yogurt to a medium bowl. Grate garlic into yogurt and stir to combine.
2. Add chopped dill and salt.
3. Fold in diced cucumber.
4. Cover and refrigerate for at least 4 hours. Serve alongside toasted pita chips, or with seasoned chicken or lamb to create your own gyros. Store, covered, in the refrigerator.
Friday, August 12, 2011
Almost Cannoli Cake
You may be wondering if I baked Dan a cake for his birthday. I did, of course. But I'm not in love with how it turned out, so instead of sharing the less than stellar recipe, I'll just ply you with lots of pictures.

As I'm sure you've guessed from the title of this post, it was supposed to be a Cannoli cake. White cake. Cannoli cream filling. White icing. Crushed cannoli shells on the outside.

Looks pretty right? It was. It just didn't really tastethat awesome like cannoli. Did that stop us from eating it straight from the serving plate with our forks? Take a guess.

Ok, I'll admit: it was so bad....

Only kidding! Although that picture really makes me laugh. Almost helps me to forget how disappointed I was at how this turned out.

Oh well. There's always next year...

As I'm sure you've guessed from the title of this post, it was supposed to be a Cannoli cake. White cake. Cannoli cream filling. White icing. Crushed cannoli shells on the outside.

Looks pretty right? It was. It just didn't really taste

Ok, I'll admit: it was so bad....

we lit it on fire

Oh well. There's always next year...
Wednesday, August 10, 2011
Dan's Birthday Dinner: {Bacon} Macaroni and Cheese

Yesterday was Dan's birthday, so at his request, I made him this Bacon Macaroni and Cheese for dinner. If you've never had homemade macaroni and cheese, I am so, so sorry.
Well, let me rephrase. I grew up sort of hating homemade macaroni and cheese. I was a Kraft-fake orange powder-blue box girl all the way. I wasn't even into Velveeta. And whenever my mom would make homemade mac and cheese for dinner, my sister and I would groan and roll our eyes and make faces as we pushed it around on our plates. (Now would be a good time to say that my mom is a very good cook. She's always been in the kitchen with me and is the one who taught me to cook. But for some reason (and I completely blame whatever crappy recipe she must have used and not her clearly superior cooking skills. Hi mom!) her macaroni and cheese always came out lumpy and oily and separated. Think: ricotta cheese gone very, very wrong.)
In summary, I think she tried to serve it to us twice and then gave up. Thinking back, I have no idea when I first tried this Holy Grail of a version, or what prompted me to do so, but ever since, it has been a staple in my recipe rotation. We love it so much we serve it at Thanksgiving. That's right: Macaroni and Cheese for Thanksgiving (plus turkey, stuffing, potatoes, and about 72 other delicious things. Thanksgiving's sort of my thing. It's a blessing, and a curse).
So what makes this macaroni and cheese so amazing?
1. The fresh breadcrumbs. Make them. They will change your life and you will never be able to use dried breadcrumbs again. Sorry.
2. Good quality cheese. Don't buy the pre-shredded orange
3. The cheese sauce. Sooo different than just sprinkling cheese on pasta and waiting for it to melt. It's creamy and rich and luxurious. Is that enough adjectives for you? And yes, you have to stir it the whole time. Think of it as burning calories that you will be thankful for when you're eating the leftovers, cold, out of the fridge in the middle of the night.
4. The spices. The warm nutmeg, the lemony thyme, and the cayenne. Oh, the cayenne. This mac and cheese has a little kick to it. If you don't like so much spice, dial it down to 1/4 tsp (if you must), but at least try it my way first.
5. Bacon. Originally, and classically, I don't make this with bacon. And it is still AWESOME. But for a special occasion (specifically when making this for a boy), adding some yummy smoky meaty bacon is a nice touch. I mean, can you ever go wrong with bacon? I think not. OH! And DON'T THROW AWAY THE BACON GREASE! Save it! It will keep well stored in the fridge for a few weeks or in the freezer for much longer than that. Use it to grease the pan when you're making scrambled eggs. Or, if you really want to amp up the bacon flavor for this dish, cut the 6 Tbls of butter used in the cheese sauce to 3 Tbls and replace it with some of the bacon grease. Ooh, naughty.

And in case you're wondering, yes, I did make Dan a birthday cake. Stay tuned for that mini disaster. I probably should have just put candles in this and called it a day.
{Bacon} Macaroni and Cheese
Ingredients
Serves 8 as a main course, 12 as a side dish.
This dish can be made 2-3 days in advance. Follow all directions, but wait to make and add the breadcrumbs until ready to bake and serve. Store unbaked macaroni and cheese in the fridge, covered.
8 Tbsp (1 stick) unsalted butter
5 slices white bread, crusts removed, cut into quarters
5 1/2 cups milk
1/2 cup all-purpose flour
1 tsp salt
1/4 tsp freshly grated nutmeg
1/4 tsp freshly ground black pepper
3/4 tsp cayenne pepper
1/2 tsp fresh thyme leaves, chopped
18 oz grated white cheddar cheese (about 4 1/2 cups)
5 oz grated Pecorino Romano cheese (about 1 1/4 cups)
1 pound cavatappi pasta
10 slices bacon (optional)
Directions
1. Heat oven to 375 degrees. Grease a 9 x 12'' rectangular baking dish.
(1a. If using bacon: Place a metal baking rack on a sheet pan with sides. Lay each bacon slice over the rack so they aren't touching each other or the bottom of the sheet pan. Bake until crispy, about 15 minutes. Transfer to a paper-towel lined plate to drain. Set aside to cool. Once cool, crumble or chop into pieces.)
2. In a medium saucepan set over medium heat, heat milk just until warm. In a high-sided pot over medium heat, melt 6 Tablespoons butter. When it bubbles, sprinkle in flour. Cook, whisking for 1-2 minutes or until all the flour has dissolved and cooked.
3. While whisking, add hot milk a ladle-full at a time, whisking to incorporate before adding the next amount. Once about half the milk has been added, pour the remaining milk in slowly, and continue whisking.
4. Continue cooking, using the whisk to stir the mixture continuously, until the mixture bubbles and becomes thick, 5-8 minutes.
5. Remove pan from the heat. Stir in salt, pepper, nutmeg, cayenne, and thyme. Add 3 cups cheddar cheese and 1 cup Pecorino Romano (and bacon, if using). Set aside.
6. Fill a large saucepan with salted water. Bring to a boil and add pasta. Cook 3 minutes less than the manufacturer's instructions. Transfer pasta to a colander and drain well. Stir pasta into reserved cheese sauce and pour into prepared baking dish and set aside.
7. Transfer bread pieces to a bowl of a food processor fitted with the steel blade. Pulse until breadcrumbs form. Melt remaining 2 Tbls butter. Pour over bread crumbs and pulse to incorporate.
8. Sprinkle remaining cheddar and Romano cheeses evenly over top of the macaroni and cheese. Top with breadcrumbs. Bake until the cheese is bubbly and the breadcrumbs are toasted, about 35-40 minutes. Place under the broiler for a few seconds for a browner top. Transfer dish to a wire rack to cool 5-10 minutes. Serve hot.
Adapted from Martha Stewart
Tuesday, August 9, 2011
Last Week in Review

A visit to an old favorite

where the cheeseburgers have cheese on both sides

and you eat in your car.
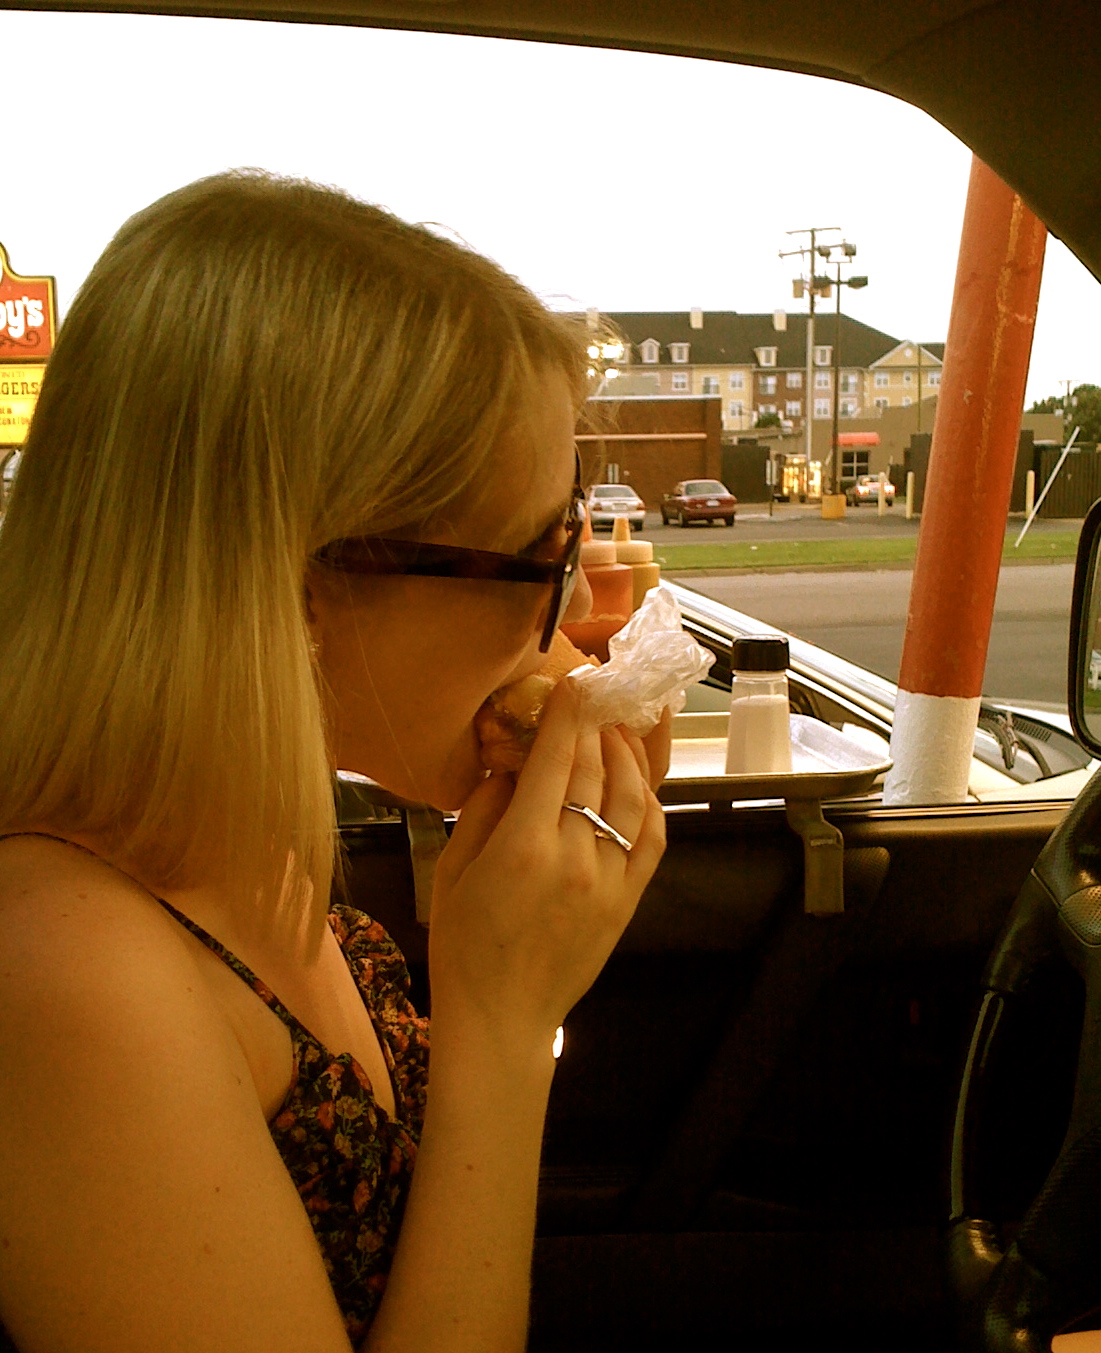
See? Me, eating in my car.

Crepes for breakfast. So fancy and French.

Homemade pizza dough

for our homemade pizza.

So worth it.

Making enough pesto to last us through winter. Or at least through the Fall.
Subscribe to:
Posts (Atom)
