Showing posts with label side dish. Show all posts

Wednesday, November 30, 2011

Roasted Brussels Sprouts


Friday night, I dreamed about these brussels sprouts. More importantly, I dreamed that I was in the running to win a James Beard award just for these brussels sprouts. Well, to be more specific, Dan was in the running to win the James Beard award. I'm not sure why he was getting the credit, but I didn't even care as long as these brussels sprouts got the recognition they deserved.

That's how freaking good they are. Dan was going to get MY faux James Beard award and I DIDN'T EVEN CARE.

Going into Thanksgiving, I knew I was making roasted brussels sprouts, but I hadn't quite decided on a recipe. With three conflicting recipes, there were lots of decisions to make. Bake at 400 or 425? With shallots or without? Bacon or no bacon? Simple or with dressing? In the end, I sort of made it up as I went along and worked with what I had (which meant a last minute switch from a sheet pan to a baking dish).

Roasted Brussels Sprouts
Yield: 6-8 Servings

Ingredients:
1/2 lb bacon
3 lb brussels sprouts
2 shallots, sliced thinly
olive oil
salt & pepper
2 tsp apple cider vinegar
1 Tbsp honey

Directions
1. Preheat oven to 350 degrees. Lay bacon out on a wire rack set over a sheet pan. Bake bacon for 25-30 minutes, or until crispy. Remove to a paper towel lined plate to drain. Set aside and increase the oven heat to 400.
2. Trim the ends off the brussels sprouts and cut in half through the root end. Place brussels sprouts in a 9x13'' baking dish with shallots. Drizzle olive oil over top and sprinkle with salt and pepper. Toss to coat.
3. Bake in preheated oven for about 20 minutes, tossing occasionally to promote even cooking. Meanwhile, chop or crumble bacon. Add to brussels sprouts and continue to cook, stirring occasionally until the brussels sprouts are tender and starting to caramelize, another 20-25 minutes.
4. Remove vegetables from the oven and drizzle with vinegar and honey. Toss to coat. Taste and adjust seasonings as necessary. Serve immediately.

Monday, November 14, 2011

Cold Spicy Thai Noodles


Do you ever have that magical moment when you see a new recipe and realize you actually have all the necessary ingredients in your stockpile? For me, that was the case for my Dirty Blondies, but these Thai Noodles came pretty close too. Aside from the garnishes, I had everything I needed!


I'm sorry I didn't time myself while I made these because I suspect that in the time it took for the pasta water to boil and the noodles to cook, I had prepped all the garnishes and the sauce. Unfortunately, I still had to wait a couple hours for the noodles to chill, but let me tell you, they were worth the wait. Spicy and savory, but still refreshing thanks to the cool noodles, crunchy carrots, and fresh herbs. But make no mistake, this is spicy! It'll make your lips burn and clear out your sinuses.

Mmm, hurts so good

Cold Spicy Thai Noodles
Yield: Serves 2-3 as a main course; or 4-6 as a side

Ingredients:
1/2 lb spaghetti
2 Tbsp vegetable oil
1/4 cup sesame oil
2 tsp crushed red pepper flakes
3 Tbsp honey
3 Tbsp soy sauce
Squeeze of lime juice
1 large carrot, peeled and shredded
3 green onions, chopped
1/4 cup cilantro, roughly chopped
1/4 cup peanuts, roughly chopped

Directions:
1. In a small sauce pan, combine both oils and crushed red pepper. Heat over medium heat just until it begins to bubble. Cook for another 2 minutes then remove from the heat. Let the oil steep while the pasta cooks.
2. Prepare spaghetti according to package directions. Strain and set aside.
3. In the bottom of a large bowl, whisk together the honey, soy sauce, and lime juice. Position a fine mesh strainer (or a strainer lined with cheesecloth) over the bowl. Pour the reserved oil through the strainer. Discard the chili flakes. Whisk the sauce until emulsified.
4. Pour the reserved pasta into the bowl and toss to combine. Refrigerate until cold, about 2 hours.
5. When ready to serve, toss pasta with carrots, onions, and cilantro, and garnish with peanuts. Serve cold or at room temperature.

Recipe Notes:
  • I used my vegetable peeler to get the long shreds of carrot.
  • You could definitely add some cooked chicken, meat, or tofu to beef this up a bit and serve it as a main course.
  • For a milder version, use just 1 tsp red pepper flakes.
Adapted from A Small Snippet

Tuesday, November 8, 2011

Twice Baked Potatoes


I have to call my grandma, and explain to her what a blog is. I have a feeling it might get confusing. And maybe a little weird.

How do you explain what a blog is to someone who doesn't really use the internet.

Disclaimer: These are not my hands

It's a website? Sort of like a journal? A public journal? A food journal?

I'll let you know how it goes.


In the meantime, let's do something simple. Like make potatoes! Specifically delicious, creamy, cheesy stuffed potatoes.


Consider these potatoes a blank canvas. I've included just the most basic version, but customize it! Add a splash of cream. Try smoked gouda. Add some chives or scallions, or any green herbs for that matter. Add some bacon. Then call me and invite me over for dinner. Add shrimp and Old Bay! That one I'll skip.


Twice Baked Potatoes
Yield: 4-6 Servings

Ingredients:
3 Russet Potatoes
3 Tbsp unsalted butter
2 Tbsp cream cheese (or sour cream)
1/2 cup cheddar cheese, shredded, plus more for topping
salt & pepper
Paprika for dusting

Directions:
1. Preheat oven to 400 degrees F. Wash potatoes thoroughly and pierce each two or three times with a fork. Place potatoes directly on oven rack and bake 1 hour, or until fork tender.
2. Remove potatoes from oven and reduce heat to 350. While still hot, cut each potato in half lengthwise and scoop out into a medium bowl, keeping the potato skin intact and removing as much potato as possible. Set potato skins aside.
3. Using a potato masher or large fork, break up potato. Add butter, cream cheese, cheddar cheese, and a pinch each of salt and pepper. Mix and mash until potatoes are a little thicker and chunkier than mashed potatoes. Taste and adjust seasonings as necessary.
4. Place reserved potato skins in a 9x13'' baking dish, hollow side up. Fill each potato skin with filling, dividing equally among the 6 halves. Sprinkle with additional cheddar cheese and a dash of paprika. Cover dish with aluminum foil.
5. Bake potatoes at 350 for 10 minutes. Uncover and continue to bake another 5 minutes, or until cheese is melted and potatoes are heated through. Serve hot.

Recipe Notes:
  • I like my mashed potatoes to have some texture to them, but if you like a very smooth filling, cream the potato filling with an electric mixer instead of mashing by hand.

Tuesday, October 4, 2011

Maple Candied Bacon

Hi. I made you candied bacon. You're welcome.


The smell of this crackling in the oven, made the whole house seem warmer. The combination of bacon, maple, and cinnamon- seriously, I want my house to smell like this ALL the time. If someone out there knows of a candied bacon-scented candle, hook me up.

While I could have just eaten these all on their own, I did what any sane person would do: dipped them in chocolate and added them to cookie dough. Unfortunately, I was testing out a new cookie recipe and they didn't turn out exactly right (too much butter!), so I'm not going to share it. But here's my advice instead. Melt some chocolate chips, about 1/2 cup. Cover the candied bacon with the chocolate and put it in the freezer for about 15 minutes, or until the chocolate is set. Chop it up and add it to your favorite chocolate chip cookie recipe in place of the chocolate chips, and add a pinch of cinnamon to the batter. I Die.

Another choice? Crumble it up and add it to popcorn. Salty and sweet and delicious.

Maple Candied Bacon
Yield: 2 Servings

Ingredients:
1/2 cup granulated sugar
1 Tbsp ground cinnamon
5 slices bacon
2 Tbsp maple syrup

Directions:
1. Preheat oven to 375 degrees F. Line a rimmed baking sheet with aluminum foil. Place a wire rack on the baking sheet.
2. In a small bowl, mix together sugar and cinnamon. Pour onto a shallow plate.
3. Lay the bacon slices over the wire rack. Brush both sides of the bacon with maple syrup. Dredge the bacon in the cinnamon- sugar mixture and return to the wire rack.
4. Place the baking sheet in the middle of the oven and bake 15 minutes. Flip the slices of bacon over and sprinkle with additional cinnamon-sugar. Continue to bake another 10-15 minutes, or until desired crispiness.
5. Remove bacon to a paper towel-lined plate to drain for about one minute. Serve warm or reserve for another use.

Thursday, September 15, 2011

Israeli Couscous Salad


At the FCI, the culinary students were in charge of making family meal for the whole school, so each day around noon we were served a freshly prepared hot lunch (unless it was exam day which meant sandwiches and salads, which I secretly loved). Over the course of six months, there were a few dishes which popped up over and over again. Some were better than others- the roasted beets with caramelized onions changed my life and I finally tried quinoa for the first time. But when we uncovered those serving dishes and saw Israeli couscous piled high, I was first in line with my plate.

Israeli couscous (sometimes called pearl couscous) is actually a type of pasta, shaped in tiny little balls, but you can usually find it with the rice in the grocery store. It's very different than the traditional couscous you may be used to eating, and it's a great blank canvas for adding in different flavors.


You can of course prepare it and eat it warm with just some herbs and maybe a little butter, but here I've cooked and chilled it to turn it into a cold salad. I don't know why, it's just what my brain was telling me to do.

Actually, that's a lie. It's because I had this recipe for vinaigrette that I was dying to make, and rather than put it on something super healthy like salad, I chose carbs. However! You will have vinaigrette left over after making this, which I suggest you store in the fridge and pour over a pretty green salad. That's right, you just made yourself some homemade salad dressing. You're awesome.


Israeli Couscous Salad
Yield: 4 servings

Ingredients:
1 cup Israeli/pearl couscous
1 1/4 cups chicken stock
1 tablespoon Dijon mustard
5 tablespoons red wine vinegar
1 squeeze of honey
squeeze of lemon
1/2 teaspoon salt and freshly ground pepper
Chopped herbs (chives, parsley, dill, thyme, etc.)
1/2 cup good olive oil
1/4 cup red onion, small diced
1/4 cup green bell pepper, small diced
1-2 oz crumbled feta

Directions:
1. Consult the cooking instructions on your couscous and cook according to instructions, but substitute the chicken stock for cooking liquid. For mine, in a small saucepot, I brought chicken stock to a boil. I added couscous, lowered heat to simmer, and covered. I simmered, stirring occasionally, 8-10 minutes. Transfer to a large bowl and set aside to cool.
2. Make the dressing. In a small bowl or measuring cup, whisk together mustard, vinegar, honey, lemon juice, salt and pepper, and herbs (I used rosemary, chives, and thyme). While whisking, slowly pour in olive oil. Taste and adjust seasonings if necessary (You can also do this in a small food processor. Pulse all ingredients together before adding the olive oil through the feed tube with the machine running).
3. Pour about 1/4 cup of dressing over couscous, tossing to combine. Add chopped onion and green pepper. Transfer to the refrigerator to chill, at least 30 minutes.
4. Just before serving, add crumbled feta and taste. Add more dressing if necessary and/or adjust seasonings. Garnish with more fresh herbs. Serve cold or at room temperature.

Monday, September 5, 2011

Braised Kale

I know, I know. Another kale recipe. Hey, don't you roll your eyes at me. Even I like this one.

Sorry about these pictures. My kitchen lighting at night leaves something to be desired. Like natural light.

"Braising" might sound kind of fancy or complicated, but the premise is really simple. Heat up some oil (reserved bacon grease would be awesome for this). Saute some onions and garlic. Have some shallots? Even better. Add the kale, or really, any dark, leafy green. I even found mine in the bagged salad section, all clean and ready to cook!


Add the braising liquid- chicken stock, veggie stock, even water. Cover it and let it steam. Add an acid. I like vinegar but work with what ya got: white wine, lemon juice, whatevs. Add a little more, add a little less, it's totally up to you. Add some heat. Mix it up and you're done!

Do you think a serving of this cancels out those two brownies I ate when no one was looking? What about the one I'm going to eat later. Maybe I should go snack on these leftovers, just in case. 


Braised Kale
Serves 4 

Ingredients:

Olive oil
1 tsp fresh garlic, finely minced
3/4 cup yellow onion, small diced
16 oz kale leaves, cleaned, stems removed, and roughly chopped
1 1/4 cups chicken broth
1 Tbsp, plus 1 tsp apple cider vinegar
1/4 tsp crushed red pepper flakes, or to taste
1 tsp kosher salt
1/2 tsp pepper

Directions:
1. Place a large, deep saute pan over medium high heat. Add enough olive oil to coat the bottom of the pan. When the oil is hot, add onion. Saute until translucent, about 3 minutes. Add chopped garlic and saute until fragrant, about 30 seconds.
2. Lower heat to medium. Add as much of the kale leaves to the pan as will fit. Don't worry, they'll cook down! Carefully stir them around so they cook evenly. As the leaves wilt, add more fresh kale to the pan, continuing to stir, until all kale has been added. If the pan seems dry at any point, add a little extra olive oil to prevent the onion and garlic from burning.
3. Add the chicken broth and stir to incorporate. Cover the pan and let steam for 10-15 minutes, stirring occasionally. When kale leaves taste tender, add the vinegar and spices. Serve warm.

Saturday, July 30, 2011

Kale Chips


Kale chips; have you heard of these? Have you tried them? I hadn't but for some reason after I heard Gwyneth Paltrow talk about making them on Ellen, I was determined.

And I don't even really like Gwyneth Paltrow.

People will tell you, "These taste just like potato chips!"

They're wrong.

Yes, they're thin and crunchy, and yes they're salty, but the curly leaves have a very distinct texture that you'll either really like or won't be able to stand (sadly, I was in the latter group, which is such a shame because I'd much rather stuff my face with leaves than calorie-ridden fried potatoes).


I only started eating kale recently, but I usually love it sauteed with some chicken stock and apple cider vinegar to give it that yummy acidic bite. Cooked this way, it almost takes on the texture of cooked broccoli. I'll try to remember to jot down the recipe the next time we make it so I can share it here.

A few things to note about kale chips:

Don’t be shy with the olive oil. The last thing you want to be doing is scraping dried kale off your sheet pan.

Then again, don't over oil them or they won't crisp. If you take them out of the oven and they still look a little oily, remove the chips from the sheet pan and let them drain on paper towels before transferring them to a serving bowl.


You can season your chips however you like (although I recommend always using some kosher salt). You can stick to simply salt and pepper, you can sprinkle on some curry powder, or, one of my favorite combinations I tried was salt, chili powder, and a little cayenne. I've even seen some people sprinkle on brown sugar. Try lots of combos and pick your favorites!

I’ve heard rumors that little kids love these, and are too young to figure out that what they’re eating is also healthy. Plus, the recipe is super kid-friendly: it's quick, there’s no chopping involved, and raw kale has this great scrunchy texture that makes it really fun to squeeze, so if you find yourself faced with entertaining a small child, make these. Plus, they’ll be out of the oven by the time you’re done cleaning up. Instant gratification? Yes, please.


Kale Chips

Ingredients:

5-6 leaves kale
olive oil for drizzling, 3-4 Tablespoons
salt and other spices, to taste

Directions:

1. Preheat oven to 350.
2. Wash kale leaves and dry thoroughly. My salad spinner worked awesomely.
3. Tear or cut the leaves from the woody stems, and into pieces about 2-3’’ big.
4. Arrange leaves on a baking sheet and drizzle with olive oil, and sprinkle with seasonings. Use your hands and toss to coat. Arrange the leaves in one layer on the baking sheet. If the sheet pan is too crowded, the kale will steam and will not crisp properly.
5. Bake chips for 11 minutes or until leaves are slightly shrunken and edges are dark green.
6. Remove from oven and sprinkle with more salt, to taste.

Sunday, January 24, 2010

Prosciutto Roasted Bass with Autumn Vegetables

So, remember my love affair with Whole Foods that began a few months back? Well, it's OVER. O-V-E-R.

It was a brisk Saturday afternoon and I was really in the mood to do some serious cooking, which I'd taken a break from for a little while, getting settled in my new house and job, etc. I had all my ingredients listed, had worked out contingency plans based on what ingredients I could or couldn't find, and was even ready to brave the craziness that is Short Pump on a Saturday afternoon.

I fought my way into the parking lot, staked out a decent space, and ignored the angry stares I got from other drivers as I sat and waited for what seemed like forever for the current occupant to pull out.

I headed into Whole Foods, lists in hand, and grabbed a cart since I needing ingredients for 2 dishes. I maneuvered around all the people milling about the produce department and made a beeline for the seafood counter. Unfortunately Halibut is out of season, but they did have beautiful fillets of Chilean Sea Bass, so I got 2 8-oz portions.

Then, I headed over to the produce department, and that's where things start to go downhill. I needed parsnips and butternut squash for this dish, and I knew I was going to make soup next, so I also needed fennel. Hmm, where could all of these things be? Searching, searching, dodging other people's carts... I couldn't find anything anywhere. No squash. No parsnips. No fennel.

Seriously?

It was just about this time that I started to get irate and mumbling to myself about how much I hate Whole Foods. It takes 20-25 minutes to get there, it's always ridiculously packed on the weekends, and now THEY DON'T HAVE ANYTHING I NEED?!?!?!?! SERIOUSLY??

Yes, I needed other things that were staples, like carrots and garlic, but I knew I could get those at Ukrops, and probably for a much cheaper price, so I wasn't going to waste my money. The only other things I bought were red wine (which I couldn't get at Ukrops since they don't sell alcohol, although thankfully not for long) and ciabatta bread.

Please picture my cart: fish, wine, bread. I didn't even need a basket, let alone a whole big cart.

I was completely over it at this point and just wanted to check out and get the hell out of there, but lo and behold, since everyone and their MOTHER was at Whole Foods, every checkout line was at least 8 people long. Commence more grumbling, angry texting, and awkward stares from strangers. "Yes, my cart is practically empty! Because I couldn't find a damn thing I needed in this godforsaken place!!" 

Checkout person in obnoxiusly cheery voice: Hi there! Did you find everything you needed?
Me: *Blank, angry stare* 
Checkout person: Ok....

Ok, so I know what a lot of you (or the few of you that actually read this) are thinking: Morgan, was it really that big of a deal? So you couldn't find what you needed; there are other grocery stores out there. Jeez, talk about sweating the small stuff.

And maybe I am overreacting a touch... But here's my suggestion to those of you who think I'm being a drama queen. Come visit me in Richmond for the weekend, and we'll take a trip out to Short Pump on Saturday afternoon, because in order to understand the madness, you really have to experience it for yourself. And to repay you for risking your sanity in order for me to prove a point, I'll cook dinner for you...if we survive.

Getting back to my epic journey for produce. Once I had escaped the black Whole Foods (Get it: black hole...Whole Foods. What, not funny?) and vowed never to shop there again, I made my way to Fresh Market. Not only was it a little closer to my house, but it was also pleasantly populated with only a handful of other shoppers. Unlike Whole Foods, I'm used to shopping at Fresh Market since we have one in Virginia Beach, so I felt pretty comfortable walking in. (I will say, the meat and produce department at Fresh Market leads a little something to be desired. It's the one thing Whole Foods still holds over its competition. Bastards. Anyway...)

Looking around the produce department, I wasn't letting my hopes get up too high, but once I spotted the fennel, I started to feel a bit calmer. Someone stocking produce saw me milling about and easily found the parsnips for me. Someone else even checked in the storeroom to see if they had any butternut squash (they didn't, but I forgive them). My next stop was the deli counter to get thick-cut pancetta. Unlike my first nearly failed attempt to get this ingredient, the deli worker knew exactly what I was talking about, knew the correct thickness to slice it to, and even gave me a pointer to put it in the freezer for a few minutes to make it easier to cube.

Now that's the kind of shopping experience I want to have. Fresh Market, you are my new best friend. Can I just move in? And may I just say, how sad is it that I was so excited that the workers at Fresh Market were actually helpful? I mean, come on, that's what they're paid for and yet, I was so thankful and relieved after my hellish Whole Foods experience.

Of course, as awesome as Fresh Market was, I had to make one more stop, at Ukrops, to get some of the staple items I needed. But I was still on my Fresh Market high, so it wasn't all that bad.

So I FINALLY had all my ingredients together. I know, you thought we would never get to this point. Believe me, so did I.

Once at home, I organized my ingredients

butternut squash, parsnips, carrots, yukon gold potatoes, garlic, fish, lemon, butter, rosemary

and preheated the oven.

I diced the butternut squash, potatoes, parsnips, and carrots into a very small, 1/2'' dice and placed them all on a sheet pan. I mixed up the vegetables, drizzled them with olive oil, salt and pepper, and tossed together again. I spread them out in a single layer


and put the pan in the oven to roast. After 15 minutes, I tossed the vegetables so that they would brown evenly and they went back in the oven for another 25 minutes.

In the meantime, I lined another baking sheet with foil and placed a baking rack on top. I brushed the fish fillets with olive oil on both sides and seasoned them pretty liberally with salt (while Dan looked on disapprovingly) and pepper. I wrapped each fillet in a slice of prosciutto, forming a wide band around the center of each piece of fish, and overlapping the ends of the prosciutto. These then went, seam side down, on the baking rack.


When the vegetables had 15 minutes left, I put the fish in the oven as well.

Once the vegetables had been roasting for a total of 30 minutes (are the fish had only been in for 5), I added the minced garlic and tossed to combine. The vegetables went back in the oven with the fish for another 10 minutes.


With about 5 minutes remaining, I melted the butter in a saute pan and added the rosemary, still whole and attached to the woody stalk.


I cooked this over a low heat, until the rosemary got a little crispy and the butter had just started to brown. This took a little longer than 5 minutes, but that was ok because the fish was pretty thick and I think needed more than 15 minutes to cook. Once the fish was ready, I discarded the rosemary and added the lemon juice to the butter.

Then it was time to plate! I plated the fish and veggies, then spooned the rosemary-lemon butter over top of the fish. I garnished with some lemon wedges.


I'm still not convinced the fish was completely cooked through, but Dan and I survived and the prosciutto was nice and crispy, which I loved. Each bite I got with the salty prosciutto was so good, but the rest of the fish was only ok. Sea bass isn't a fish I typically eat, but thought it would be pretty safe since it's a nice white fish. I think with a little stronger seasoning, or maybe by wrapping multiple pieces of prosciutto around the entire fillet of fish, I would have really liked this.

My favorite part of the whole dish was the roasted vegetables. Ordinarily I really hate cooked carrots, probably because I'm used to the sickeningly sweet version you're forced to eat as a child, but these were quite good. I had never had parsnips so I had no idea what they were going to taste like, but they were also really yummy; a little sweet, good texture, and not overwhelming in any way. And the butternut squash and potatoes were delicious, as expected. 

Make this when: you're feeling totally stuffed after Thanksgiving or another big holiday meal. The fish is nice and light, but the fall vegetables are still delicious and satisfy that craving for something hearty and seasonal. 

Next Course: Pappa al Pomodoro

Just a head's up, there may be some changes to the blog coming soon, so stay tuned...

Thursday, December 3, 2009

Parmesan-Roasted Broccoli

Scene: Ukrops, Monday night, weekly grocery shopping
Me: We need about 2 pounds of broccoli. 
Dan: What, why?! That's way too much. What are we going to do, just eat a ton of broccoli and nothing else????? 
Me: Don't get hysterical. I'm going by what the recipe says and it says 2 pounds makes 3 servings. 
Dan: *Picks up 1 small head of broccoli (weighing less than a pound) and puts in cart*

Boy did he regret that decision later...

I know I tend to go on and on about all the things I don't like or refuse to eat, but broccoli is one of the few veggies I really like. I will say though that I am partial to the tops. I was a little skeptical about roasting it in the oven for this recipe since one of my roommates used to cook it this way, but it always resulted in a sort of funny smell and brown-tipped broccoli which wasn't too appetizing. Nevertheless, once we got home from the store, I preheated the oven and got all my ingredients together:

  broccoli, garlic, olive oil, salt, pepper, lemon, pine nuts, Parmesan cheese, basil

I cut the florets away from the big stalk, but tried to leave about an inch of the thinner stalk attached. Since this head of broccoli was small (ahem), this was a little challenging, but I did my best and put the broccoli florets on a baking sheet:


I sliced the garlic cloves thinly and added them to the sheet pan. I drizzled the broccoli and garlic with olive oil, sprinkled with salt and pepper, and tossed everything to combine. I tried to strategically place the garlic slices on top of the broccoli pieces to impart as much garlic flavor into the vegetables as possible:


I put the pan in the oven and set the timer for about 20 minutes. While they roasted, I toasted the pine nuts in a dry pan, zested and juiced the lemon, julienned the basil, and grated the Parmesan. Once the broccoli was crisp and tender and the florets were browned, I removed the pan from the oven:

  Just a tad too brown

As soon as the broccoli was out of the oven, I put it in a bowl and tossed it with more olive oil, the lemon zest and juice, pine nuts, Parmesan and basil. I also added a little more cheese to the top once it was plated:

Ready for my close up, Mr. Demille

Despite the fact that the broccoli was just slightly crispier than it should have been, this was really delicious. Dan even went so far as to say it was the best thing I had cooked yet. Then I reminded him about the Indonesian Grilled Swordfish and he reconsidered. But this was a close second and was probably the best veggie dish I've made so far.

The lemon, basil, and Parmesan really escalated the flavor of the broccoli and turned something ordinary into something really special. I mean, this was the best broccoli I have ever had. Really. It was complex, balanced, and flavorful, and you could still enjoy the broccoli's flavor without it being smothered in thick hollandaise or cheese sauce. 

Me: So Dan, enjoying your broccoli over there?
Dan: *Mouth too full to talk* 
Me: Bet you're wishing you had listened to me back there in Ukrops, huh? 
Dan: *Pauses, with mouth still full* Yeffshh...  
Me: *Defends own plate of broccoli with fork* 

Make this when: you've put on about 5 pounds of Christmas cookie weight and need to add more veggies to your diet so other people's kids will stop calling you Santa/Mrs. Clause. The broccoli cancels out the cheese...and nuts...right? 

Next Course: Date Nut Spice Bread

Sunday, November 22, 2009

Maple-Roasted Butternut Squash

Ok Ina, what is the deal with all this butternut squash? Oh, it's one of your favorite vegetables? Well some of us think it tastes like baby food.

Ok, maybe a tad harsh.

But after the last butternut squash debacle, it's certainly how I felt. When I first read this recipe, it's only saving grace were the whole garlic cloves that roast alongside the butternut squash that I would be able to smear all over crusty french bread and ingest at an alarming rate. So I dove into this recipe with my sights set pretty low.

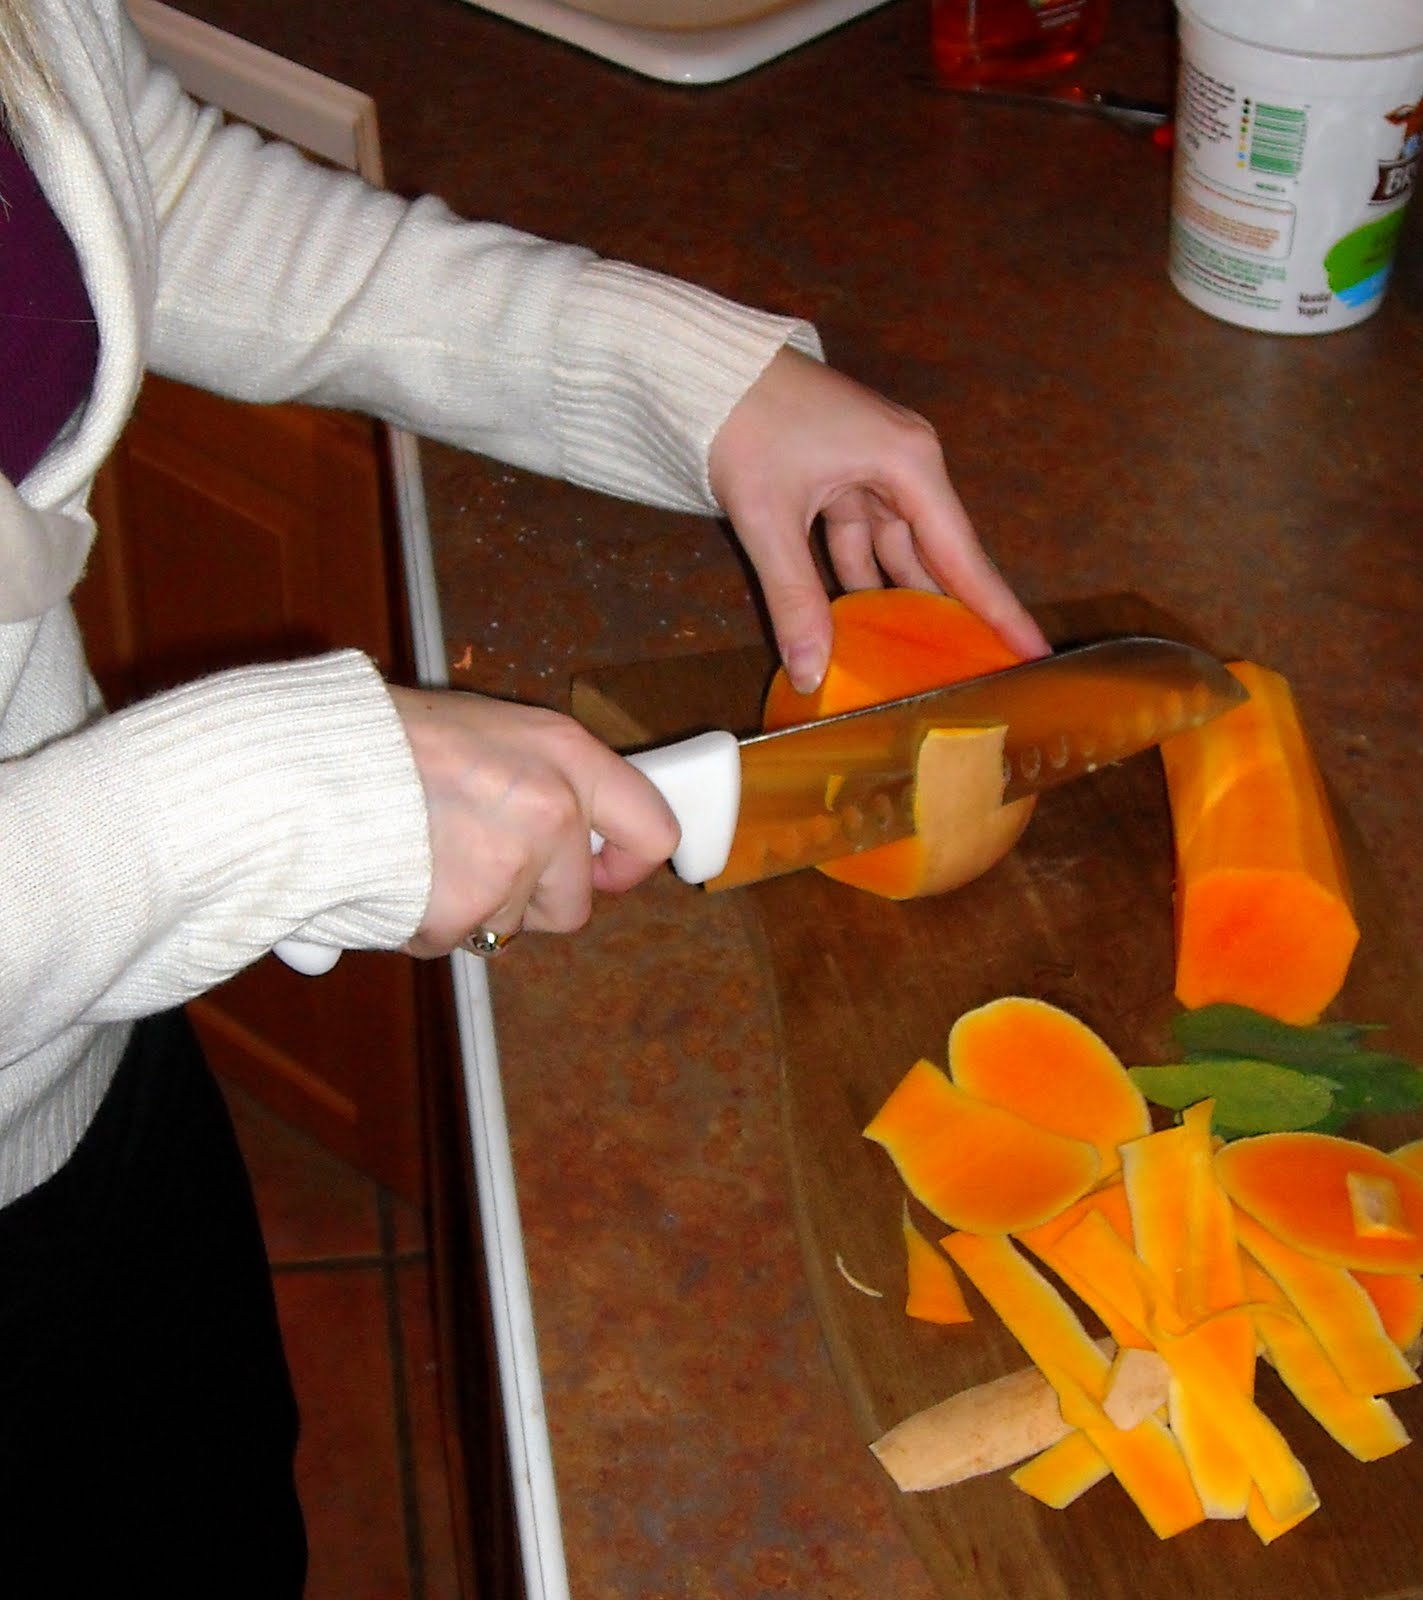
I bought a pretty small butternut squash, since I assumed only Dan would be eating it. Since I used a vegetable peeler to peel it last time, I decided to try a different technique this time. I cut the squash, separating the top from the round bottom part. Then, using a kitchen knife, I peeled each piece individually:

This method was definitely faster than the vegetable peeler and is the one I recommend using

After peeling, I seeded the squash into the sink. Although Dan likes butternut squash and pumpkin seeds (which squash seeds very closely resemble) the smell of the butternut squash innards seriously offended his senses, causing him to whimper every time he got too close to the sink. Since I didn't want this to impede his ability to do the dishes, with a role of my eyes, I pushed the squash seeds down the garbage disposal and out of smelling range.

I diced the squash and put it on a baking sheet with about a handful of unpeeled garlic cloves and tossed everything with olive oil, maple syrup, salt and pepper:

A sticky job, but somebody had to do it

It's important to leave the garlic unpeeled so they don't burn in the oven, and since I was most looking forward to this part of the dish, I made sure they were well coated in olive oil as well. I put the garlic and squash into a preheated oven and set the timer for 20 minutes.

Luckily, this recipe calls for thinly sliced pancetta which is easy to find already packaged in the grocery store. Now, I know what you're thinking: But Morgan, I thought you said in the Wild Mushroom Risotto blog that you had never seen a recipe that called for thinly sliced pancetta. Well, Ina has proven me wrong. Fortunately though, this meant that neither Dan nor I had to go toe to toe with anyone in the deli department to get the usual thick slice.

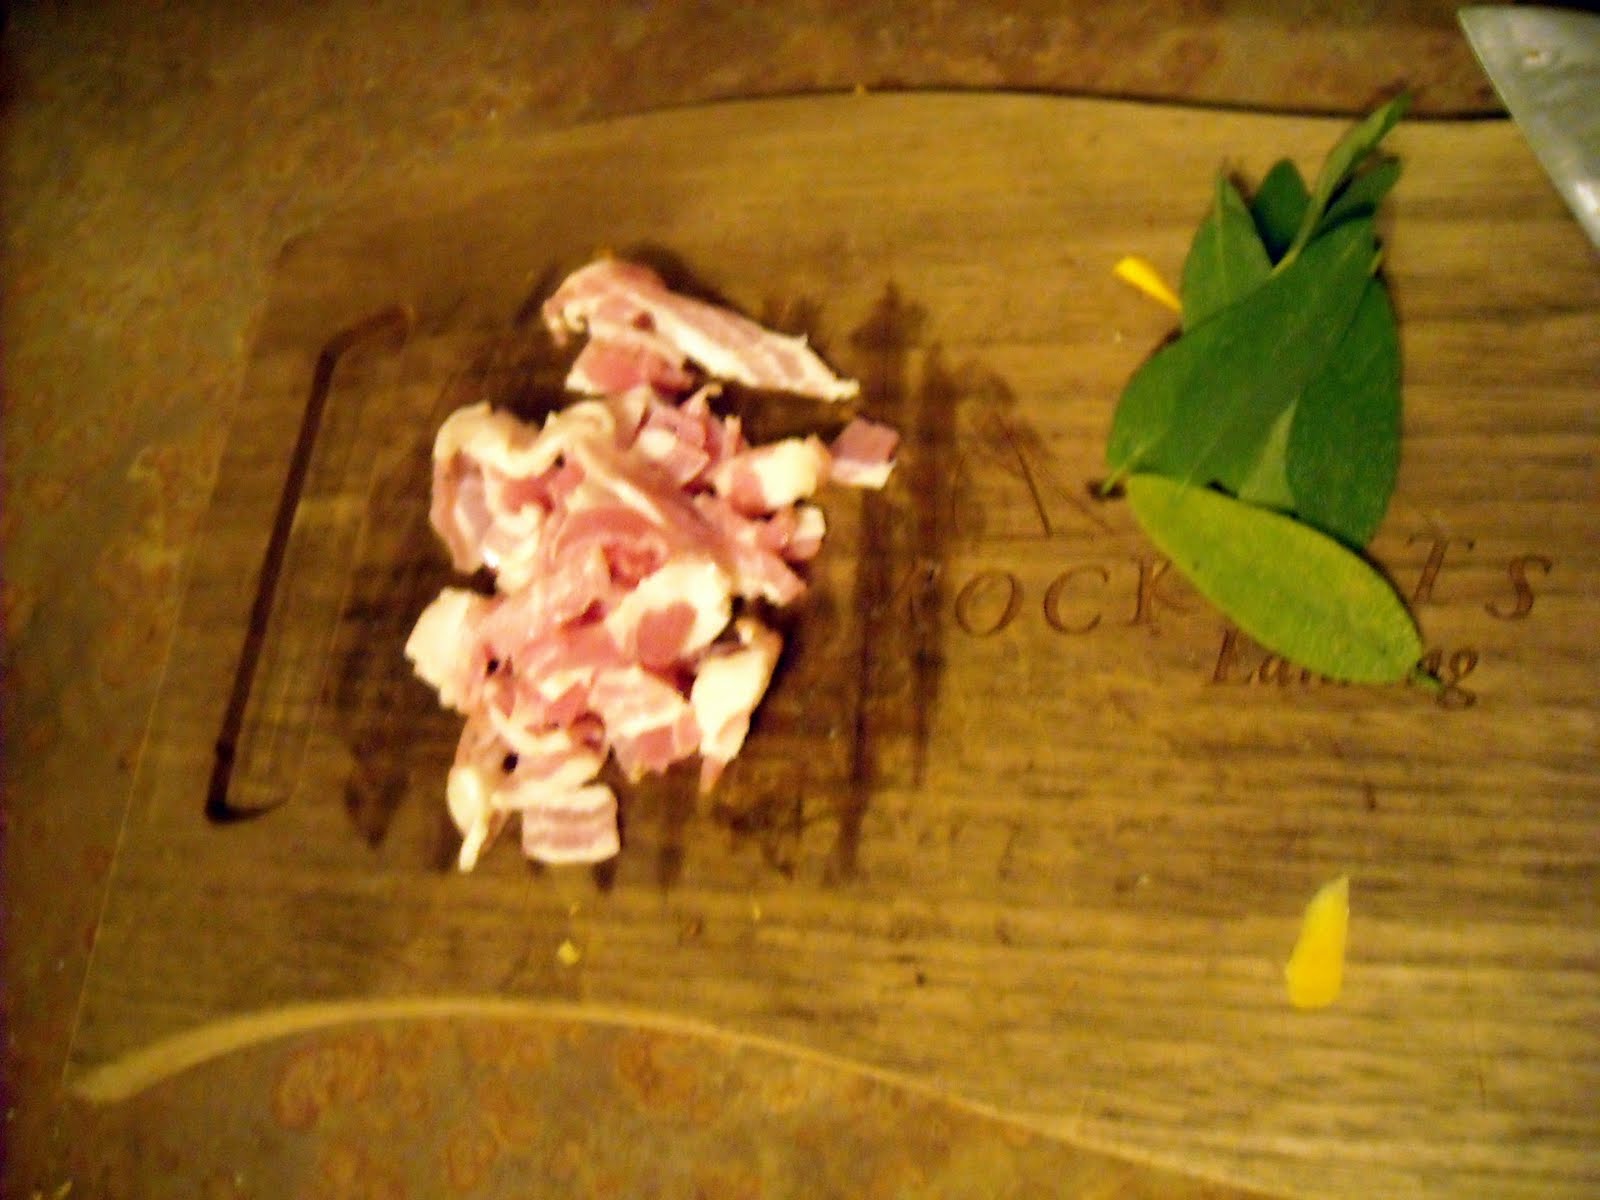
While the squash and garlic roasted, I chopped the pancetta and put it together with the fresh sage from Dan's herb garden:


After 20 minutes, I removed the squash from the oven and added the pancetta and sage evenly over the pan:

mmm bacon and garlic

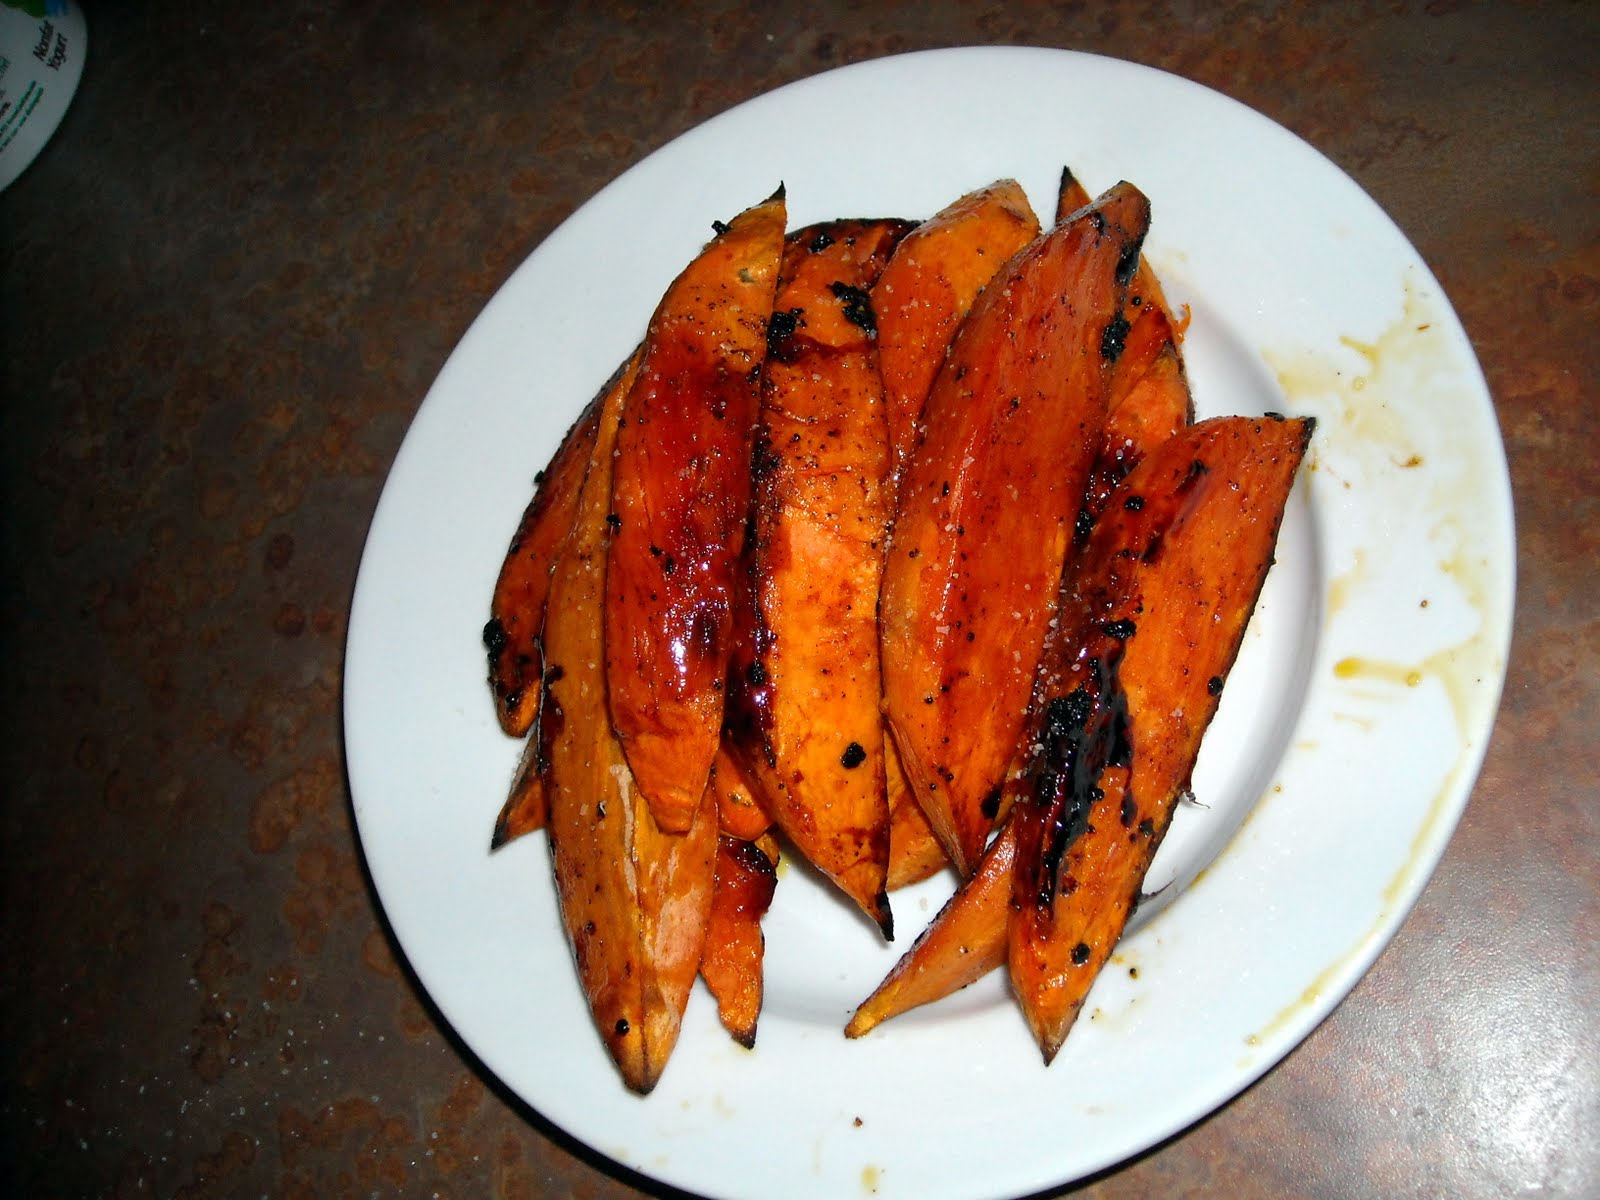
I put the pan back in the oven and continued to bake it until the squash and garlic were tender. Once fully cooked, I removed the pan from the oven and plated:

please note the generous portion of bread for all that yummy garlic

I was actually pleasantly surprised with how this whole dish turned out. The squash was not as tender as the last time I cooked it, making the texture much more enjoyable, and the salty bite from the pancetta balanced the sweetness of the squash perfectly. The sugar in the squash combined with the maple syrup causes it to caramelize slightly, which was yummy, but made some pieces of squash a little sticky. Since the squash is diced into little cubes, the side of each piece that spent the most amount of time in contact with the sheet pan became too brown, causing the sugar to burn slightly and become hard and sticky. As per the directions, I only turned the squash once during the baking process, before adding the pancetta and sage, but an additional toss is definitely necessary during the second round in the oven in order to avoid this problem.

The garlic was just a tad overdone which made it a bit of a challenge to remove from the peel, but once it was on the bread, it was sweet, garlicky, and delicious. I found the easiest way to get at the garlic was to use my fingers and push it out of the peel, which got a little messy, but meant I got to lick my garlic-flavored fingers afterward. Ladylike, I know. My ratio was about 1 garlic clove per piece of bread, but I was holding back. Interestingly, the sage didn't really add much to the dish. The leaves remained whole but got crispy, and I don't think they're really intended to be eaten so they didn't impart much flavor to the squash. They did gave the dish some nice color though, and a little bit of visual texture. I would definitely make this dish again, but probably with some minor adjustments.  With this dish, my respect for butternut squash has been restored, so thanks Ina.

Already thoughout this process I've tried so many things that before, I wouldn't have even considered: cremini and morel mushrooms, scallops, dates, sweet potatoes, and butternut squash, and I've really enjoyed (almost) all of them. It's kind of amazing how much my tastes can expand as long as I'm just willing to try a few new things. Of course, I'm never going to like everything I make (sometimes due to operator error), but I'm happy to keep trying! 

Make this when: hosting a very casual Fall dinner party since spreading the roasted garlic on the bread can get a bit messy and all your guests will end up with garlic breath. 

Next Course: Parmesan-roasted broccoli

Thursday, November 19, 2009

Baked Sweet Potato "Fries"

Sweet Potatoes! Yet another thing that I'm not usually a fan of. I know what you're thinking, does this girl eat anything? And the answer is, yes. Just not sweet potatoes. Or squash. Or nuts. Or eggs.

Many of the recipes in this book I've been halving, since it's just Dan and me and we usually can't eat six servings of something, no matter how good it is. This was one recipe though, that I didn't halve, because buying just one sweet potato seemed silly. Of course, that was before Dan found "Man Potato."

Allow me to demonstrate:

"Man Potato" is the one on the left. The scissors are there to give you some perspective.

Since this potato was freakishly large, I didn't use it in this recipe, but that definitely would have sufficed to feed both Dan and me, probably for the rest of the week. Instead, I used the two medium-sized potatoes to the right.  Here are all of my ingredients:

Sweet potatoes, light brown sugar, olive oil, salt and pepper. Pretty simple.

I preheated the oven and delegated the first task, peeling the potatoes, to Dan so my hands wouldn't turn orange:


Naked potatoes! 

While Dan halved the potatoes (so I wouldn't cut my fingers off) and began slicing them into wedges, I combined the brown sugar, salt, and pepper:

  Such a delicate task

The recipe says to slice each potato in half, and then cut each half into 3 spears, but  these seemed big, especially compared to the picture in Back to Basics, so we used our best judgment and cut some of the larger pieces into smaller ones:

Yes, they were initially even bigger than these

I placed the potato wedges on a sheet pan and tossed them with olive oil:


I sprinkled the brown sugar, salt, and pepper mixture evenly over the potatoes, ensuring each potato had some sugar on it, and that they were spread in a single layer:


 These baked in the oven for about 15 minutes. At that point, I turned them with a spatula, and put them back in the oven for another 5-10 minutes. Once out of the oven, I sprinkled them with more salt and plated:

Sorry this plate is a little messy. I'm not sure why I didn't take the time to clean it before taking the picture. I blame it on hunger.

Ina says these should be crispy, like fries, but ours were pretty soft. I would guess that they weren't sliced thinly enough because the longer you cook sweet potatoes, the softer they get. I added quite a bit of salt to mine, because I like the contrast of the sweet and savory, and as I've said before, I generally like my potatoes salty. These were much better than I expected, and even Dan, who is a big fan of just plain baked sweet potatoes said these were some of the best he has had. Generally when I think of sweet potatoes, I picture them as sickeningly sweet and with a consistency closer to baby food than mashed potatoes (appetizing, I know). These were soft, but not mushy, and if I could get them crispy, I think they would be really amazing.

Make this when: you're asked to bring the sweet potato dish to Thanksgiving this year. They'll be expecting the traditional sweet potato-mini marshmallow disaster, and you'll deliver this fabulous updated version instead. 

Next Course: Maple-Roasted Butternut Squash

Wednesday, November 18, 2009

Creamy Cheddar Grits

In order to get into the true spirit of this dish, imagine, if you would, that I'm writing in a southern accent. That's right, break out that old Southern twang and read as if you're sitting with Paula Deen, sipping sweet tea on a porch somewhere in Savanna; or, if you're feeling really adventurous, go ahead and read aloud. Yes ma'am, I said aloud. And no need to feel silly; everyone else will be doing it too. Ready? OK.

First, I had to find the right kind of grits. The recipe calls for fine quick-cooking, but not instant, grits. Since Dan's a grits connoisseur I trusted him to steer me to the right aisle. We went into the natural/organic food section, and Dan picked a bag of Bob's Red Mill Organic Grits. "You can see our Quality!" boasted the package. It looked like sand to me.

Not wanting to believe that we had to buy this ridiculous specialty bag of grits, I went back to the cereal aisle to see if I could find the right kind of grits but at a better price.

We bought Bob's.

Once home, I gathered the grits together with all of my other ingredients:

grits, half-and-half, butter, cheddar cheese, scallions, salt, and pepper 

I put a pot of water on the stove and brought it to a boil. I added the salt and then slowly added the grits:

 
I attempted to add them in a constant, slow, steady stream, while stirring constantly, but it was a bit of a struggle. Since the container I was using didn't have a pour spout, the grits didn't want to stream out in a constant motion. Instead, some would come out, then stop, then some more, then stop. I added them all though, relatively successfully, and lowered the heat to a simmer. This simmered for about 5 minutes, while I stirred occasionally. After the 5 minutes, the grits looked something like this:


I added the half-and-half and butter:


I brought this mixture to a simmer again, stirring occasionally. Once it was back up to a simmer, I lowered the heat somewhat, covered the pot and set the timer for 45 minutes. Throughout the 45 minutes, I continued to stir occasionally. Here's what the grits looked like after about 20 minutes:

Looking a bit less like soup

In the meantime, Dan grated the cheddar cheese:

I followed Ina's advice and bought really good Cabot cheddar from Vermont. Cheese is one thing I don't mess around with.

and I chopped the scallions:


After about 45 minutes, the grits had thickened and were smooth and creamy:


Off the heat, I added the cheddar cheese and scallions and stirred to combine:


Here's the final plating:


And here's Dan's plate about 10 minutes later:


In her description Ina likens these to mashed potatoes, which I was very skeptical about. Mashed potatoes are one of my favorite things and I didn't think grits could hold a candle to them. But once I tried them, I saw the similarity. They were creamy and filling, but unlike mashed potatoes which I can eat for days, these grits were a little too rich for me.

I don't usually eat grits, and I was concerned they would be coarse or grainy, but they weren't at all. Unlike me, Dan is a big fan of grits and, as evidenced by his plate above, he really liked these. The recipe instructs to serve these hot, and that is definitely necessary. As they cooled, they became less creamy and firmed up, almost to the point that if I had wanted to, I could have made the grits into patties and fried them (yum).  

Make this when: your boyfriend's grandmother is visiting from South Carolina and you want to show her that even women who live above the Mason-Dixon Line can cook a bowl of grits. 

Next Course: Baked Sweet Potato "Fries"
Related Posts Plugin for WordPress, Blogger...