Showing posts with label entree. Show all posts

Thursday, January 26, 2012

Mustard Barbecued Pork


Is anyone tired of winter yet? It seems like it. Valentine's decorations are out, people are pinning Easter cookies. Seriously people, what's the hurry? Winter isn't so bad. No need to mow the lawn or rake leaves. No sticking to your hot leather car seats. Plus, you can leave your oven on all day without needing to stick your head in the freezer.

This is another of those recipes with fall off the bone tender meat. That takes just 10 minutes of prep in the morning and hours later, dinner's magically on the table with hardly any additional work. That will infuse your house with such an enticing, delicious smell your neighbors will come sniffing at your windows.


The mustard sauce for this barbecued pork is a little unconventional, but it's popular in parts of South Carolina. With family in Charleston, Dan's been raving about it for years, so when this recipe popped up in this month's Southern Living, it went on my short list.

I also took their advice and made Banh Mi sandwiches. Sort of a cross between a Vietnamese and French sub sandwich. Grab some crusty bread, like big slices of a french baguette. Add some sriracha mayonnaise (sriracha+mayo!), pickled peppers and onions (Seriously, don't skip these!). Top everything off with some shredded carrot and a few paper-thin slices of jalepeno. Sprinkle on some cilantro leaves if they don't give you flashbacks of having your mouth washed out with soap.


Mustard Barbecued Pork
Yield: 8-10 servings

Ingredients:

1/3 cup light brown sugar, packed
2 1/2 tsp kosher salt
1 1/2 tsp garlic powder
1 1/2 tsp paprika
1 tsp onion powder
1/2 tsp ground red pepper
1 5-lb bone-in pork shoulder (Boston butt)
1 cup yellow mustard
1/3 cup honey
1/4 cup apple cider vinegar
1 1/2 tsp Worcestershire sauce

Directions:
1. Preheat oven to 275 degrees. In a small bowl, combine the brown sugar and all dry spices. Rub all over pork shoulder and place in a large dutch oven.
2. Whisk together the remaining ingredients to create a sauce. Pour over top of the roast.
3. Cover and roast 8-10 hours. Remove from oven and let sit 15 minutes. Shred with two forks and stir into remaining sauce.

Pickled Peppers & Onions

Ingredients:
1/2 red onion
1/2 red bell pepper
1/2 yellow bell pepper
1/2 green bell pepper
1 cup white vinegar
1 cup water
6 Tbsp granulated sugar
2 Tbsp kosher salt
1/2 tsp crushed red pepper flakes

Directions:
Slice the onion and peppers into 1/4'' thick slices. Let the onion slices soak in a bowl of ice water for at least 10 minutes. In a small pot, bring vinegar, water, sugar, salt, and pepper flakes to a boil, stirring occasionally to ensure the sugar is dissolved. Place the pepper and onion slices in a large glass bowl of 1-qt canning jar. Pour the warm liquid over the vegetables and allow to sit, uncovered at room temperature for 1 hour. Cover and chill for 24 hours. Store refrigerated for up to a week.

Recipe Notes
  • If you have a large enough slow-cooker (mine was too small), follow all the above directions but cook in your slow cooker on low. If you're short on time, you can cook it on high for just 4-6 hours.
  • If you're just planning on making this for a regular weeknight dinner, you're going to end up with plenty of leftovers. Freeze them flat in plastic bags for easier storage and quicker defrost.
  • If you're sticking with a more traditional barbecued pork sandwich instead of a Banh Mi, make some extra mustard sauce to mix into the cooked meat or drizzle on top of each sandwich. Don't forget the slaw!
Recipe adapted from Southern Living Magazine

Thursday, January 12, 2012

Chicken and Kale Baked Pasta


Hey, you. Yeah you. You need this pasta in your life. It's creamy, and cheesy, and comforting, AND chocked full of healthy things. Which means this totally fits into your New Years Resolution diet. 

No really, I'm not kidding. Multigrain pasta? Check. Protein-packed chicken? Check. More than a pound of healthy greens? Check!


Seriously, have you gotten on this kale thing yet? If not, what are you waiting for?? It's super healthy, easy to cook, and tastes rich and delicious.


Still not convinced? I swear, this is the perfect vehicle to introduce kale into your world. The flavor definitely takes a back seat to the nutty Parmesan, creamy ricotta, and bright lemon. And the texture blends right in to the rest of the pasta.


It's a great way to get in those healthy veggies with the added bonus of comforting carbs and cheese. Seriously, is there anything better? I think not.


Chicken and Kale Baked Pasta
Yield: 6-8 servings

Ingredients:
1 box (14.5 oz) multigrain rotini pasta
2 Tbsp unsalted butter
1 yellow onion, diced
3 garlic cloves, minced
1.5 lb kale, tough stems and ribs removed, coarsely torn or chopped
1/3-1/2 cup chicken stock
2 cups cooked chicken, shredded or cut into pieces
48 oz part-skim ricotta cheese
Zest of two lemons
3/4 cup grated Parmesan cheese, divided

Directions:
1. Preheat oven to 350 degrees. Cook pasta according to package instructions. Drain and return to pot or very large bowl. Set aside.
2. In a large high-sided skillet or another deep pot, melt butter over medium heat. Add onion and cook, stirring occasionally, until translucent, 3-4 minutes. Add garlic and cook until just fragrant, another minute.
3. Add the kale along with 1/3 cup chicken stock. Cover and allow the kale to steam for 2-3 minutes. Uncover the pot and stir, adding the additional chicken stock if the pan is too dry. Continue to cook, covered, until the kale is just tender, another 2-3 minutes.
4. Add the kale and onion mixture to the cooked pasta along with the chicken, ricotta cheese, lemon zest, and 1/2 cup Parmesan. Stir to combine.
5. Pour the pasta into a 9x13'' baking dish. Top with the remaining 1/4 cup Parmesan. Bake 30 minutes or until the cheese is just starting to brown. Let rest 5 minutes. Serve warm, topped with additional grated Parmesan.

Recipe Notes:
  • I'm not sure why my box of pasta was only 14.5 oz instead of the usual 16, but you could definitely use a full pound with no other changes necessary.
  • If all of the kale won't fit in your pot at once, add just as much as will comfortably fit, adding more as the kale cooks down. Add the chicken stock more gradually to ensure it doesn't steam away before all the kale is cooked.
  • Obviously this is an easy dish to make vegetarian. Just leave out the cooked chicken, and substitute vegetable broth or water for the stock. 
  • If you're really not a fan of kale and I can't convince you otherwise, you could always substitute in fresh spinach or another leafy green.

Recipe adapted from Martha Stewart

Tuesday, January 10, 2012

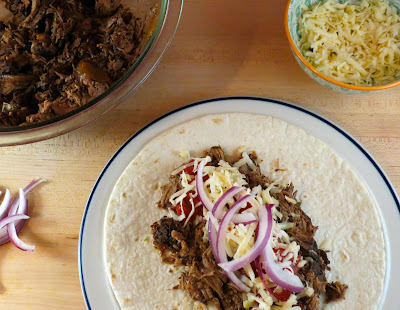
Shredded Beef Tacos


Today wasn't the best day. Someone cut me off on my drive home from work and nearly hit my car. There was a ton of traffic just minutes from my house. I had to drop off my car at the mechanic with no sign of when I'll get it back. I hit myself in the head with a door. Yup, a door.

But you know what could improve a day like today? Walking in the door to smell this simmering in the crock pot.


Dinner on the table in 10 minutes? I think so. Comfort food? Yes, please.


Taco night? Spicy.


Shredded Beef Tacos
Yield: 4 servings

Ingredients:
1 tsp chili powder
1/2 tsp cumin
1/2 tsp smoked paprika
1/2 tsp oregano
1/4 tsp pepper
1/2 tsp kosher salt
2 lb boneless chuck roast (3 lbs if bone-in)
1-2 Tbsp vegetable oil 
1 1/2 cups beef broth or stock
4 chipotle peppers in adobo sauce, diced
1 Tbsp tomato paste
1 Bay leaf
1/2 large yellow onion, diced
3 garlic cloves, minced
Flour tortillas
Taco garnishes (avocado, cheese, lettuce, tomato, etc.)

Directions:
1. In a small bowl, combine all spices (except bay leaf). Rub spice mixture evenly over beef, coating all sides as much as possible.
2. Heat a large skillet over high heat. Add vegetable oil. Heat to almost smoking. Lay the meat into the skillet, allowing the first side to sear until it is well browned, 3-4 minutes. Flip the meat over, searing the other side as well. Lay the meat into the bowl of a slow cooker.
3. Pour the beef broth into the hot pan, scraping any browned bits off the bottom with a wooden spoon. Add the peppers and tomato paste and bring to a boil. Reduce the heat to low and simmer until reduced and slightly thick, 2-3 minutes.
4. Add the bay leaf, onion, and garlic to the slow cooker, over the meat. Pour in the cooking liquid. Cover the slow cooker and cook on low for at least 6 hours, and up to 8.
5. Remove the meat from the slow cooker to a large bowl. Shred with two forks. Add some cooking liquid and onions if desired. Serve warm in flour tortillas. Garnish with your favorite taco toppings.

Recipe Notes:
  • This recipe does require some prep work, so I find it easiest to make on a day when I don't actually have to work or need to be somewhere early in the morning. But if you want to do some prep the night before, you can season the steak, chop the onion and garlic, and measure and mix together the beef stock, peppers, and tomato paste. Reserve all in the fridge overnight.
  • The heat in this recipe comes from the chipotle peppers, so add more if you like it spicy or less if you like it on the mild side.
Adapted from My Kitchen Addiction

Tuesday, January 3, 2012

Chicken Tikka Masala


Living in New York City introduced me to lots of new things. The subway. Standing thisclose to a complete stranger on the subway and being totally OK with it. Pearl River Mart. Gypsy cabs. Online grocery shopping. And Indian food.

Ok, so that last one wasn't so much about the city as it was about my roommate, Shaun. I've known Shaun for what feels like my whole life (but is really more like 12 years, so half my life), so when I decided to move to New York, he harassed me until I gave in suggested we look for an apartment together.

Clearly this turned out to be the best decision ever since I was an awesome roommate and he had mad photography skills. Plus, since he'd been living in the city for almost a year, he'd established a solid take-out routine which I fell right into with him. It didn't matter if I'd already started making dinner, or sometimes, even if I'd already eaten, if he was ordering take-out, I was down. And one of his favorite places to order from was an Indian restaurant. At first, I was skeptical. I'm not really into curry (insert apology to the angry racial profiling comment here), and the very limited access I'd had to Indian food in the past hadn't really left me craving it. But nevertheless, I'd pick something on the menu, Shaun would pick his usual, and when the food came I'd always want to trade.


Before long, Shaun and I were calling for two orders of his usual with extra garlic naan. And when I moved back to Virginia it was one of the first things I missed about the city (Shaun, of course being THE first). Unfortunately, Richmond isn't really a hotbed of eclectic dining choices, so I'd been scanning the frozen food section at Trader Joe's for months trying out different Indian options, looking for that familiar taste I'd been missing (their garlic naan is actually pretty decent). Finally, I realized if I wanted the original, I was going to have to do the leg work myself and make it.

I'm telling you, one bite in and I was right back in that tiny apartment with Shaun, sitting on our tiny couch eating out of plastic containers set on our short little coffee table, watching Real Housewives of where ever. It had all the familiar flavors I was looking for and used very few ingredients I didn't already have in the house. If you're not all that familiar with Indian food, this is a good place to start.


Chicken Tikka Masala
Yield: 2-3 Servings

Ingredients:
For the chicken:
1 lb boneless, skinless chicken thighs
1 tsp ground cumin, divided
1 tsp ground coriander, divided
1/4 tsp cayenne pepper
1/2 tsp kosher salt
6 oz plain greek yogurt
2 garlic cloves, minced
1 tsp grated fresh ginger

For the sauce:
1 Tbsp unsalted butter
1 Tbsp olive oil
1/2 yellow onion, diced
2 garlic cloves, minced
1 tsp grated fresh ginger
1 small jalepeno, seeds and ribs removed, minced
1/2 tsp ground cumin
1/2 tsp ground coriander
1 tsp garam masala
Pinch cayenne pepper
1 14 oz can crushed tomatoes
1 tsp granulated sugar
Salt to taste
1/4 cup whole milk or heavy cream
Fresh cilantro (optional)

Directions:
1. First prep the chicken. In a small bowl combine 1/2 tsp cumin, 1/2 tsp coriander, the cayenne pepper, and salt. Rub the spice mixture into the chicken, cover, and refrigerate for at least an hour.
2. In a large bowl, combine the yogurt, 1/2 tsp cumin, 1/2 tsp coriander, the garlic, and ginger. Mix well, cover and refrigerate until ready to cook.
3. When ready to cook, preheat your broiler (if using a gas stove, please see the note below!) and position an oven rack about 6'' below it. Line a sheet pan with foil and grease well with vegetable oil or cooking spray and set aside.
4. Start the sauce. In a large pot set over medium heat, melt the butter with the oil. Add onion and saute for 10 minutes, stirring often, until golden brown. Lower heat if onions are browning too quickly. Add garlic, ginger, jalepeno and spices. Stir and allow the mixture to cook another 2-3 minutes. Add crushed tomatoes, sugar, and a pinch of salt. Bring to a boil. Turn the heat down to low, cover, and simmer while you cook the chicken.
5. Dip each chicken piece into the yogurt marinade, leaving both sides well coated (don't squeeze off the excess) and place on prepared baking sheet. Broil chicken until it is lightly charred in spots, about 9 minutes. Flip the pieces over and broil the other side until it is also browned, and the chicken is cooked through, another 3-4 minutes. Remove from the oven and allow to rest, covered with foil for at least 5 minutes.
5. Slice the cooked chicken into strips and stir into the sauce with the milk. Simmer for another 5 minutes. Taste and adjust seasonings. Spoon chicken and sauce over white or brown rice, garnish with cilantro, and serve.

Recipe Notes:
  • It's pretty rare that I have whole milk or heavy cream in my fridge, so in a pinch, feel free to substitute anything else that's a little creamy- sour cream, coconut milk, buttermilk, or just leave it out all together.
  • Garam masala is a spice blend that can be a little spicy. If it's not something you've used before, add just a little, taste the sauce, and add more according to taste.
  • If using a gas stove, you may be unable to leave enough space between your broiler and baking sheet. If this is the case, broil your chicken until it is lightly charred in some spots (flip it if you'd like), but then finish it in a 350 degree oven until it is fully cooked (approx 10-15 more minutes depending on the thickness of your chicken pieces).
Recipe adapted from Can You Stay for Dinner?

Monday, November 14, 2011

Cold Spicy Thai Noodles


Do you ever have that magical moment when you see a new recipe and realize you actually have all the necessary ingredients in your stockpile? For me, that was the case for my Dirty Blondies, but these Thai Noodles came pretty close too. Aside from the garnishes, I had everything I needed!


I'm sorry I didn't time myself while I made these because I suspect that in the time it took for the pasta water to boil and the noodles to cook, I had prepped all the garnishes and the sauce. Unfortunately, I still had to wait a couple hours for the noodles to chill, but let me tell you, they were worth the wait. Spicy and savory, but still refreshing thanks to the cool noodles, crunchy carrots, and fresh herbs. But make no mistake, this is spicy! It'll make your lips burn and clear out your sinuses.

Mmm, hurts so good

Cold Spicy Thai Noodles
Yield: Serves 2-3 as a main course; or 4-6 as a side

Ingredients:
1/2 lb spaghetti
2 Tbsp vegetable oil
1/4 cup sesame oil
2 tsp crushed red pepper flakes
3 Tbsp honey
3 Tbsp soy sauce
Squeeze of lime juice
1 large carrot, peeled and shredded
3 green onions, chopped
1/4 cup cilantro, roughly chopped
1/4 cup peanuts, roughly chopped

Directions:
1. In a small sauce pan, combine both oils and crushed red pepper. Heat over medium heat just until it begins to bubble. Cook for another 2 minutes then remove from the heat. Let the oil steep while the pasta cooks.
2. Prepare spaghetti according to package directions. Strain and set aside.
3. In the bottom of a large bowl, whisk together the honey, soy sauce, and lime juice. Position a fine mesh strainer (or a strainer lined with cheesecloth) over the bowl. Pour the reserved oil through the strainer. Discard the chili flakes. Whisk the sauce until emulsified.
4. Pour the reserved pasta into the bowl and toss to combine. Refrigerate until cold, about 2 hours.
5. When ready to serve, toss pasta with carrots, onions, and cilantro, and garnish with peanuts. Serve cold or at room temperature.

Recipe Notes:
  • I used my vegetable peeler to get the long shreds of carrot.
  • You could definitely add some cooked chicken, meat, or tofu to beef this up a bit and serve it as a main course.
  • For a milder version, use just 1 tsp red pepper flakes.
Adapted from A Small Snippet

Wednesday, November 9, 2011

Sesame Noodles


Of the many, many things Dan will eat, these Sesame Noodles aren't on the list. Which is such a disappointment because they fulfill the trifecta: they're delicious, they take about 10 minutes to make, and they make great leftovers.

I looove this peanut sauce. The peanut butter and toasted sesame oil make it rich and nutty, while the crushed red pepper, and fresh garlic and ginger add just the right amount of spice and layers of flavor. I mean, come on, what's not to like?


Another thing Dan rolls his eyes at- the way I buy ginger root. Instead of buying the huge hunk they always have on display, I just break off a tiny inch-long piece, just enough for whatever recipe I'm making. Seriously, don't be afraid. No one's going to yell at you. Or take away your shopping basket. Just take a little nub and break it off. And the best part? That little piece of ginger, it's only going cost you 12 cents. Win.


Sesame Noodles
Yield: 6 Servings

Ingredients:
1 pound spaghetti
Kosher salt for pasta water
1 clove garlic
1 1'' piece peeled fresh ginger root
1/2 cup smooth peanut butter
1/4 cup low sodium soy sauce
2 Tbsp dark brown sugar
1 Tbsp rice vinegar
1 tsp crushed red pepper, or to taste
1/4 cup hot water
2 Tbsp sesame oil
2 chicken breasts, cooked and shredded 
Diced cucumber, scallions, and peanuts to garnish

Directions:
1. Cook pasta according to package directions. While the pasta cooks, make the sauce.
2. Into a blender or food processor, combine the ginger and garlic. Process until minced. Add the peanut butter, soy sauce, brown sugar, vinegar, and crushed red pepper. Process until smooth.
3. With the motor running, stream in hot water. Set sauce aside.
4. When the pasta is cooked through, drain, and transfer to large serving bowl. Toss with sesame oil. Add cooked chicken and peanut sauce. Toss to combine. Garnish with cucumber, scallion, and peanuts and serve.

Recipe Notes:
  • I poach my chicken breasts in watered down chicken stock, with some salt, peppercorns, and any veggies I have laying around- carrot, onion, celery, etc. cut into big pieces. Put everything in a pot, bring to a boil and lower to a simmer. Simmer for about 20 minutes or until chicken is cooked through. Cool and pull apart. 
  • The easiest way to peel ginger root is with a vegetable peeler.
  • I like these noodles warm, room temperature, or cold. Basically, I just like them all the time.
Recipe courtesy of Food Network

Monday, October 24, 2011

Braised Short Ribs

I've heard it's bad manners to "mmm" at the table so it's a good thing I wasn't eating this with Emily Post because I mmm-ed and ahhh-ed my way through this dinner.

Look at all those veggies. This dish is totally healthy

I think this is my favorite meal. To eat for dinner, anyway. It even outranks macaroni and cheese. It is just completely satisfying. The meat is packed with flavor and so tender it literally falls off the bone, the sauce is rich and velvety, even the vegetables taste incredible thanks to their beef stock sauna. And the garlic. Don't even get me started on the garlic. Make sure you get at least one whole clove. After hours soaking up all those juices, it will be so tender you could spread it on a piece of toast.

 Why am I even showing you these sad poorly lit photos? 
They don't even come close to doing this dish justice

Not to mention that the three hour jaunt in the oven will make your house smell irresistible. Yes, another recipe that will make you want to gnaw on your counter. I was actually dissapointed at the candle selection at Target today because they didn't have a "Braised Short Rib" variety. Can someone please get on this? I would... but I'm too busy eating.


Braised Short Ribs
Yield: 3-4 Servings

Ingredients:
3 lb short ribs
Salt & freshly ground pepper
3 Tbsp vegetable oil
3 carrots, diced
2 celery stalks, diced
1 medium yellow onion, diced
1 dried bay leaf
1 sprig fresh rosemary
1 sprig fresh oregano
3-4 sprigs fresh thyme
1 Tbsp all-purpose flour
2 Tbsp tomato paste
2 1/2 cups red wine (I used cabernet)
6 whole garlic cloves, peeled
3 1/2 cups beef stock


Directions:
1. Preheat the oven to 325 degrees F. Remove the membrane from the back of the ribs, and trim away some of the fat. Season generously with salt and pepper.
2. Heat a dutch oven or casserole over medium heat. Add the vegetable oil and heat until very hot, almost smoking. Add the ribs (in batches if necessary) and brown on all sides, about 2-3 minutes per side. Remove to a large bowl and set aside.
3. Add the carrots, celery, and onion to the dutch oven. Cook over medium heat, stirring occasionally until soft, about 7-10 minutes.
4. Meanwhile, cut a square of cheesecloth and place the bay leaf and fresh herbs in the center. Bring the corners of the cheesecloth together and tie with kitchen twine to form a bouquet garni. Set aside.


5. To the cooked vegetables, add flour and tomato paste and stir to combine. Add about half the red wine and use a wooden spoon to scrape any browned bits from the bottom of the pot. Add the remaining red wine and bring to a simmer. Continue to simmer until the wine is reduced by half, about 10 minutes.
6. Add garlic, beef stock, and bouquet garni. Return browned ribs to the pot and bring liquid to a simmer over medium-high heat. Cover and place in preheated oven. Cook until meat is very tender, 3 hours.
7. Remove cooked meat from the dutch oven. Remove and discard the bouquet garni. Set the pot on the stove over medium heat, and simmer to thicken sauce slightly. Skim any fat that rises to the top. Spoon sauce over short ribs and serve warm with mashed potatoes or creamy cheddar grits.


Recipe Notes
  • You can add the herbs directly to the pot if you don't have cheesecloth. Just remove and discard them before thickening the sauce.
  • You can sub chicken stock for beef if you really want to, but there's really no substitute for the red wine. But trust me, even if you don't like red wine (like me!) you will still love this dish.
Recipe adapted from Bobby Flay

Friday, October 21, 2011

Crockpot BBQ Pulled Chicken

It felt a little strange to be opening one of these first thing in the morning.


Mostly because if you know me at all then you know I'm really not a beer drinker. But when you're plugging in the ol' crockpot, you need to get started bright and early.

Does anyone else expect to come home to a smoldering pile of ash when you leave your crockpot on and then go to work? I mean, I would never leave my hair straightener on for 8 hours. It just seems irresponsible.


And yet so worth the risk. I could actually smell this cooking before I even turned my key in the lock. I think my dogs probably want to do some serious damage to my shoe collection after leaving them alone all day with a potentially dangerous electric appliance AND such an amazing scent growing steadily stronger throughout the day.


We never ate pork or ham growing up, but I've come to foster a serious love affair with pulled pork barbeque (and bacon, of course). It's rare that I ever order the chicken equivalent because I think it can be a little flavorless, but this is anything but. Dan even proclaimed it the best chicken barbeque he'd ever had. And that means a lot coming from a true New Yorker Southerner.


Crockpot BBQ Pulled Chicken
Yield: Enough meat for 5-6 sandwiches

Ingredients:
1 1/2 tsp onion powder
1 1/2 tsp smoked paprika
1/2 tsp garlic powder
1/4 tsp salt
1/4 tsp black pepper
4 oz beer
18 oz barbeque sauce, divided
3 large boneless, skinless chicken breasts (about 2.5 lb)
Rolls, coleslaw, and hot sauce for serving

Directions:
1. To the bowl of a crockpot add all the spices and beer. Add the chicken breasts and then 16 ounces of barbeque sauce. Turn the chicken to coat and try to submerge as much of it as possible.
2. Cover and cook on low for 8-10 hours. Remove chicken from crockpot to a large bowl and discard cooking liquid.
3. Shred chicken with two forks. Add remaining barbeque sauce and toss to coat. Serve warm, on toasted rolls, with optional coleslaw and hot sauce to garnish.

Recipe Notes
  • Feel free to replace the beer with different cooking liquid- chicken stock, water, apple cider, etc.
  • If you like less sauce, serve the remaining barbeque sauce on the side instead of tossing it with the shredded chicken.
  • I used Stubb's Mild Bar-B-Q Sauce. It's one of my favorite store-bought varieties.

Wednesday, October 12, 2011

Spinach Quiche


Given my hatred for all things eggy, you'd think quiche would be an obvious No. But something about the flaky, crunchy crust and all the cheese...it just works. I have a feeling the same could be said for someone who hates spinach. Serve them a slice of this pie and really, who could resist? I actually think what absolutely makes this is the smoked gouda. The smokiness isn't overwhelming, it just adds a little more depth to the whole thing. This is also my go-to pie crust for everything, sweet or savory. It's really easy to make and always comes out buttery and flaky. If you don't have a food processor, don't panic! You can cut in the butter for the crust by hand using a pastry cutter or a fork. Then just add the water little by little, kneading as you go. And as for the filling, just mix it up by hand.

This is what's considered a two-step pie, meaning the first step is to bake the crust by itself, and the second step is to bake the filling. If you've never blind-baked a pie crust before, it's really simple. Just follow these steps:

Start with a chilled, unbaked pie shell.

Tear off a piece of parchment paper a little larger than the size of your pie dish. Fold it in half and in half again. Identify the corner all the folds center around.

Fold the paper again bringing the corner on the right to meet the corner on the left, forming a triangle. Repeat.

Place that point (the one I've had my finger on) over the middle of your unbaked pie shell.

Cut off any excess paper, with the point in the middle, so the edge of the paper is just about at the edge of the pie shell.

Now unfold our parchment. You should be left with a pleated circle big enough to fit into your pie shell with some excess overhang. Fill with pie weights or dried beans and bake!

Spinach Quiche
Yield: 12 servings

Ingredients:
For the crust:
1 1/4 cups all-purpose flour
1/2 tsp granulated sugar
1/2 tsp kosher salt
1 stick unsalted butter, very cold, diced in to small pieces
1/4 cup ice water

For the Filling:
1 cup (8 oz) smoked gouda, cut into pieces
1 10 oz package frozen spinach, thawed and squeezed dry
2 eggs
2 yolks
1 1/4 cups half-and-half
1/4 tsp salt
1/4 tsp pepper
Pinch freshly grated nutmeg
Grated parmesan cheese

1. First, make the dough for the crust. In the bowl of a food processor fitted with the steel blade, pulse together the flour, sugar, and salt. Add the butter and pulse until the butter is the size of small peas. Through the feed tube, slowly pour the ice water with the processor running. Pulse intermittently until the dough starts to hold together. If it seems to dry, add additional ice water, 1 tablespoon at a time. Onto a floured surface, dump the dough and form into a flattened disc. Wrap well and refrigerate for at least 1 hour.
2. Preheat oven to 375. Roll dough to 1/4'' thick and fit into a 9-10'' pie plate. Line pastry with parchment and fill with pie weights. Bake until crust is set, about 12  minutes. Remove pie weights and parchment and bake an additional 5 minutes or until the bottom is dry and the crust's edge is lightly golden. Remove from oven and set aside. Keep oven on.
3. In the food processor, pulse gouda until finely chopped. Add spinach, eggs and yolks, half-and-half, and spices. Process until well combined, about 30 seconds.
4. Pour quiche filling into the prepared crust. Sprinkle some parmesan cheese on top.
5. Bake quiche for 40-45 minutes until custard is golden, puffed, and set. Let cool at least 15 minutes before serving.

Recipe Notes
  • I forgot the Parmesan cheese and it was still great.
  • To make this even more hearty, add some cooked, crumbled bacon to the bottom of the pie shell before pouring in the filling.
  • It is very important to let this rest before serving! Cutting it too soon could result in runny slices.
 Crust recipe from Martha Stewart. Quiche recipe adapted from Emeril Lagasse 


Thursday, October 6, 2011

Fettucini with Sausage and Broccolini

Guess what?! I learned a new skill!

It involves a fancy machine, paper cones, and sugar.

Know what it is?

Ok, here's your last hint- I can now run off and join the circus.

That's right, I have mastered the art of cotton candy making! We got a new machine at work for a special event the hotel was hosting, so I had to learn how to use it. And now I am totally becoming a Carnie.

But before I go, I'm making this dinner again. Because it was shockingly good. Who knew pasta with no sauce could be this delicious?


I'm not a no-sauce kind of girl. When people just throw pasta water on their noodles and call it a day, I scoff. But with the strong flavors of the sausage and caramelized onions, the nice fresh pasta, and the generous portions of cheese and olive oil, I really didn't miss it. It probably didn't hurt that I didn't drain any of the fat off after cooking the sausage. I am just SUCH a rebel. Barnum & Bailey will love me.

Don't be afraid of the broccolini. It's very similar to broccoli (obviously) but has smaller florets and thinner stalks and is actually a little sweeter. It's a good way to fancy up a dinner without having to worry if your guests will like what you're serving. To prep it, I usually just wash it, remove any green leaves, and cut the very end off the stalk.


Fettucini with Sausage and Broccolini
Yield: Serves 2

Ingredients:
olive oil
1/2 yellow onion, thinly sliced
salt & pepper
3 cloves garlic, minced
2 links Italian sausage, removed from the casing
1/4-1/2 tsp crushed red pepper flakes
3 sprigs fresh thyme
1/4 cup chicken or beef stock; or white wine
2 cups broccolini, chopped to 1'' pieces
4-5 ounces fresh fettucini
1/2 cup Pecorino Romano or Parmesan cheese, grated

Directions:
1. Place a large saute pan over medium-low heat. Add a few tablespoons of olive oil, enough to thinly coat the bottom of the pan. Fill a pot large enough to hold the pasta and broccolini with water. Add about a tablespoon of salt and place the pot over medium heat.
2. Add the onions. Cook until translucent. Add a pinch each of salt and pepper. Continue to cook the onions, stirring often, until they are nicely caramelized, about 8 minutes more. If the pan becomes dry, add more olive oil. If the onions are browning on the edges but not caramelizing nicely, lower the heat. 
3. Once the onions are nicely caramelized, add the garlic. Cook until fragrant, about 1 minute.
4. Push the onions to one side of the pan and raise the heat to medium-high. Also raise the heat under the pot of water to high. Add more olive oil to the onion pan. Add the sausage to the pan, breaking it up with a wooden spoon. Once it is mostly browned but not cooked through, stir it together with the onions and garlic. Add the crushed red pepper and thyme. Continue to cook, stirring frequently until the sausage is cooked through.
5. Add the stock or wine to the pan. As it bubbles, scrape the browned bits off the bottom of the pan with a wooden spoon. Turn the heat to low and keep warm.
6. Bring the pot of water to a boil if it isn't already. Add the broccolini and boil until not quite fork tender, about 5 minutes (Test it with a fork. You should be able to pierce it pretty easily but it would still be too tough to eat). Add the fresh pasta and continue to boil another 2-3 minutes, until al dente. Turn off the heat and add about 3 Tbsp of pasta water to the pan with the onions and sausage. Drain the pasta and broccolini into a colander.
7. Add the pasta and broccolini to the pan with the sausage. Toss to combine. Add grated cheese and a splash more of olive oil (1-2 Tbsp). Toss to coat and serve warm.

Recipe Notes
  • You can use whatever kind of sausage you would like- turkey, pork, chicken, etc. 
  • I used a sweet pork sausage so I added about 1/2 tsp red pepper flakes because I wanted it a little spicy. If you're using a spicy sausage, or just want a little less heat, use just 1/4 tsp pepper flakes or omit them all together.
  • You can easily substitute dried pasta for fresh. Just be sure to read the package instructions for the cooking time. You may need to start boiling the pasta before adding the broccolini to the pot so they are both done at the same time.

Monday, October 3, 2011

Sweet and Sour Chicken


This was dinner tonight. Sweet and sour chicken. Homemade. It didn't quite top the homemade version of General Tso's, but it was definitely better than take out.

I found the recipe here.

Do it. You know you want to. And make the extra sauce. You won't be sorry.

Oh, and I totally ate the leftovers, cold, from the fridge the next day. If that doesn't say authentic takeout taste, I don't know what does.


Wednesday, September 28, 2011

Potato, Cheddar & Bacon Pizza


Fall is my favorite season. Cozy sweaters, leather boots, crisp cool weather, changing leaves, and Thanksgiving, my favorite holiday of the year.

Oh, and football.

I'm completely apathetic about football, college or NFL. My boyfriend...is not. He's a die hard University of Virginia fan (where we both went to school) and every Saturday I relinquish control of the remote so he can watch us lose play. The one thing that does interest me about football is the food. Chili, chips and dip, fried chicken, nachos, alcohol- all good things. And this pizza.


This pizza would convince me to sit down and peruse Pinterest watch a game. It tastes just like the best potato skin you've ever had, except better. Because all that flavor is sitting on top of a thin and crispy pizza crust


Potato, Cheddar & Bacon Pizza
Yield: 4 servings

Ingredients:
1/2 recipe Homemade Pizza Crust
3 medium red potatoes, skin on
7 slices bacon
1 1/2-2 cups cheddar cheese, shredded
1 Tbsp fresh chives, minced
Ranch dressing or sour cream (optional)

Directions:
1. Preheat oven to 500 degrees F. Coat the bottom of a sheet pan with cooking spray.
2. On a lightly floured surface, roll out the pizza dough to approximately the same size as your sheet pan. Fold the dough in half and transfer to the greased cookie sheet. Unfold and stretch as necessary so it nearly reaches the edge. Brush the outer edges with olive oil and set aside.
3. Slice the potatoes thinly, about 1/4''. Drop them into a medium pot filled with water and salted. Bring the potatoes to a boil and cook 2-3 minutes, or until tender. Drain into a colander and rinse with cold water. Set aside.
4. Place a large saute pan over medium to med-low heat. Add bacon to warm pan and cook, turning occasionally, until almost to your desired doneness (it will cook more in the oven). Remove to a paper towel-lined plate to drain. Coarsely chop or crumble and set aside.
5. Assembly: Lay the potato slices onto the pizza dough, overlapping them slightly. Fill the entire dough, leaving a small outer crust exposed (or cover it entirely, your choice). Cover potatoes with shredded cheese. Last, sprinkle bacon over top.
6. Bake pizza in preheated oven for 12-15 minutes, until the outer edge of the crust is light brown. Allow to cool for 3-4 minutes. Transfer to a cutting board and garnish with fresh chives. Cut into desired slices. Serve with optional dipping condiments.

Recipe Notes:
  • Other toppings to consider: caramelized onions, jalepenos, broccoli florets

Wednesday, September 21, 2011

Fried Rice


Driving home from work today I was thinking about dinner: Ok, let's see. I could just pull something from the freezer, but the leftovers are really piling up in the fridge. We have lots of lasagna leftover but we just had that last night. What about a salad, like a deconstructed version of the lettuce wraps? I don't know about ground meat in a salad, though and we're out of cucumber. I really want to use that leftover turkey in something. Pasta? No. Quesadilla? No. Hmm, what do you eat with Chinese food..... Rice? Yes, Fried Rice!

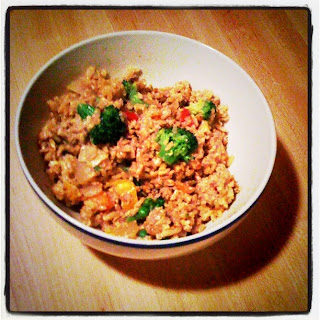
And that's how this dish came to be.

The method I like to use comes from an old Chinese cookbook my mom has. Since I don't like eggs, I naturally hate the little pieces of egg in your typical fried rice, and they're impossible to pick out or eat around because they're so damn small. But this recipe has you beat the eggs and add them to the pan after the rice. So instead of scrambling, the eggs coat the rice and give it almost a cheesy texture. However, if you're into eggs and want those big pieces in your rice, beat them lightly in a small bowl and add them to the pan before you add the rice, scrambling them like you would for breakfast. Then, just add the rice and continue with the recipe, but omit the eggs from the sauce mixture later.

I've decided to just use my iPhone at night instead of my digital camera so I can pass off my pictures as "artsy" instead of just "crappy." Is it working?

Fried Rice
Yield: 3-4 Servings

Ingredients
1 cup uncooked rice, brown or white
3 Tbsp olive oil
1/2 onion, chopped
1/2 tsp garlic, minced
1/4 tsp ginger, minced
2 eggs, lightly beaten
3-4 Tbsp soy sauce
1/4 tsp sesame oil
1/2 tsp rice vinegar
2 cups cooked meat
1/2 tsp Chinese five spice powder
1/4 tsp crushed red pepper flakes, or to taste
1/4 cup frozen peas
9 oz box frozen vegetables

Directions
1. Cook rice according to package instructions, but replace half the water with chicken stock.
2. Spray a high-sided skillet liberally with cooking spray. Place over medium-high heat and add olive oil. Add onions and cook until edges are lightly browned. Add garlic and ginger and cook until fragrant, about 30 seconds.
3. Add cooked rice to the skillet and stir to avoid it from sticking. Lower the heat to medium. In a small bowl, mix together eggs, 3 Tbsp soy sauce, sesame oil, and vinegar. Pour over rice mixture, stirring continuously, scraping the bottom of the pan periodically to prevent sticking.
4. Lower the heat to medium and add the meat, spices, and then the frozen veggies (no need to thaw). Continue to cook until the veggies are heated through, stirring occasionally. Taste and add additional tablespoon of soy sauce if desired.

Recipe Notes
  • You can use any kind of cooked meat you like; shredded chicken, cubed ham or pork, any ground meat. Or you can use tofu or omit the meat altogether to go vegetarian.
  • If you're using leftover meat from these, the Chinese five spice powder isn't necessary.
  • You can definitely use fresh veggies instead of frozen, but you'll need to par cook them first. Just add them to salted boiling water, for 1-2 minutes depending on the vegetable, and then plunge them in an ice bath before adding to the rice.


Tuesday, September 20, 2011

Chinese Lettuce Wraps

When you read the title of this post did your mind immediately jump to a certain Chinese restaurant chain? Perhaps one that has those yummy spicy and sweet lettuce rolls that, last I checked, were always sitting at someone's table?

Well, these.... are not like those. But they're still so, so good.


Ground turkey (not ground turkey breast) is something I've been cooking with for years, first in chili, and then for tacos. But those were the only two things I could think to do with it. We hardly ever make burgers at home, and when we do we like to splurge and use really high quality beef. And given that there are legendary meatballs served at Dan's childhood house on a semi-regular basis, turkey meatballs are never on my menu either.

And then these lettuce wraps entered my life. Thank goodness. Given the time it took to make them (maybe 20 minutes?) and how simple they seemed, they far exceeded my expectations. I will be making them again and again. And if ground turkey's not really your thing, you could definitely use ground pork or chicken instead.


Chinese Lettuce Wraps
Yield: 3 servings

Ingredients:
1 large garlic clove, minced
1/2 tsp ginger root, minced
2-3 Tbsp olive oil
1 pound ground turkey (or pork or chicken)
salt & pepper
1 tsp Chinese five-spice powder
2 Tbsp brown sugar
3 Tbsp soy sauce, divided
2 Tbsp granulated sugar
Juice of one lime (or about 1/4 cup)
8 to 10 sturdy lettuce leaves such as iceburg
1 carrot, shredded
1/2 cucumber, peeled, seeded, and julienned
chopped peanuts

Directions:
1. In a skillet over medium heat, cook the garlic and ginger in the olive oil.
2. Raise heat to medium high. Season meat with salt and pepper and add to hot skillet. Brown the meat and drain off any excess liquid or fat and discard. Add the five-spice powder, brown sugar, and 1 tablespoon of soy sauce. Continue to cook until no pink remains and meat is cooked through.
3. Combine the remaining soy sauce, granulated sugar, and lime juice in a small bowl and set aside as a dipping sauce.
4. To assemble: scoop the turkey mixture into lettuce leaves and garnish with carrots, cucumber, and peanuts. Drizzle sauce over top or use as a dipping sauce.

Recipe adapted from Victoria Granof

Wednesday, September 14, 2011

General Tso's Chicken


This was dinner Monday night: Homemade General Tso's Chicken.

It's always a bit of a gamble trying out a new recipe for a familiar take-out dish. Lots of questions go through my head: Will it taste the same? Will it be exponentially more difficult than picking up the phone and ordering it? Will it save me money? But mostly, will it taste the same?

Let me tell you, this was FAN-tastic. It tasted almost exactly like your standard delivery dish, and took probably the same amount of time from start to finish as it would waiting for someone to deliver it (unless you have a super speedy delivery guy in which case, I want his number). Plus, it gave me the option to use chicken breasts instead of thighs, so it was a tiny bit healthier.

After we were finished cooking, our house even smelled like a Chinese (American) restaurant. For days afterward. Honestly, it was a small price to pay for how yummy this was. With this, plus my standard stir-fry recipe in my repertoire (I'll post it the next time I make it) I can't imagine I'll be ordering Chinese food anytime soon. Now, if only I could figure out how to make a good version of Thai Drunken noodles...

Here's the recipe. I followed it pretty closely with these exceptions:
1) I used chicken breasts instead of thighs.
2) I had to add a splash of water (maybe 1 tsp) to the marinade so it was less like a paste and more like something that could actually coat the chicken.
3) I used low-sodium soy sauce, which I highly recommend.
4) Although I didn't actually make these changes, if I were to make it again (which, uh YES), I'd halve the amount of fresh ginger root in the sauce and double the chili-garlic sauce to make it a little spicier.
5) We had ours with steamed kale instead of broccoli because I JUST CAN'T GET ENOUGH.

Friday, September 9, 2011

Chicken Salad


Growing up, there was this little neighborhood market near my dad's house that had the BEST chicken salad. It wasn't overly dressed or salty, the chicken meat was high quality and the perfect bite size, and they used the magic ingredient: fresh dill.  

I think this recipe is a close approximation of what it tasted like (although I still think Bazemore's was better; how did they do it?!), and is also based on my favorite potato salad recipe that combines mayonnaise, tangy mustard, and beautiful bright fresh dill. The celery and red onion add a much needed crunchy texture as well as a little heat. And I love that you can see all that fresh dill and whole grain mustard throughout the salad so you know exactly what to expect it to taste like.

Chicken Salad
Yield: 3 cups

Ingredients: 
2 cups cooked, cubed chicken
1/2 cup celery, diced
1/2 cup red onion, diced
1/2 cup mayonnaise
2 Tbsp milk
2 tsp dijon mustard
1 1/2 tsp whole grain mustard
1/2 cup fresh dill, chopped
1/2 tsp salt
1/4 tsp freshly ground pepper

Directions:
1. In a large combine chicken, celery, and onion.
2. In a smaller bowl, whisk together the mayonnaise, milk, and both mustards. Add dill.
3. Pour as much dressing over the chicken as you would like (I used it all). Stir to coat evenly. Taste and adjust seasonings if necessary.
4. Refrigerate for at least thirty minutes, or until chilled. Serve cold.
Related Posts Plugin for WordPress, Blogger...